What is Kinedu Educators?
Kinedu Educators boosts your students’ development both at school and at home.
It works as a planning tool that allows educators to:
- Plan weekly activities easily, using a plan generated specifically for your students’ needs.
- Access over 2,000 educational resources created by experts for each age and stage of development.
- Track the progress of each student through different developmental milestones.
- Share messages, activities, and the students’ progress with their families.
How does it work?
Kinedu uses artificial intelligence to create personalized plans for each classroom according to the progress and development of the students.
The progress of each student is measured through many developmental milestones, which are based on the four key areas of development: physical, cognitive, linguistic, and social and emotional.
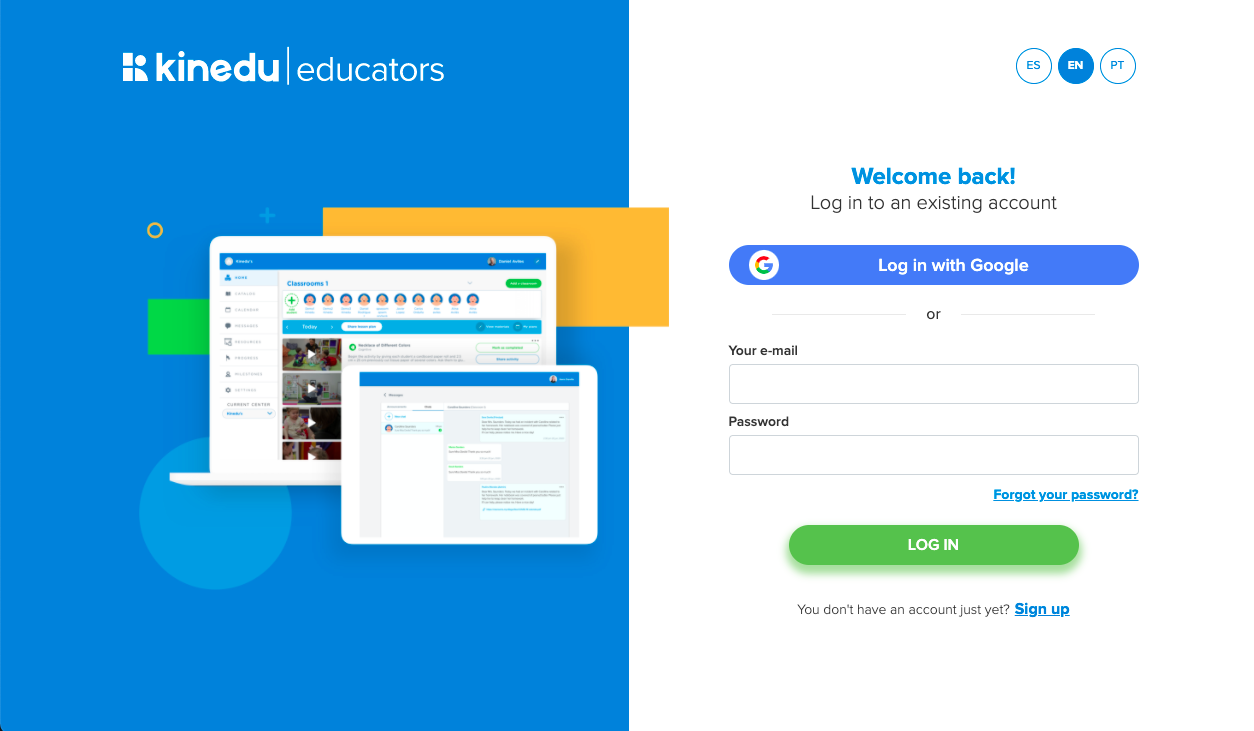
Accessing Kinedu Educators
Create your profile
If your school hasn’t created an account yet, you can follow these steps to create a new profile:
- Go to edu.kinedu.com/signup on your browser (preferably Chrome).
- Enter the email you’ll be using and create a password, or enter using a Gmail account by clicking “Sign up with Google”).
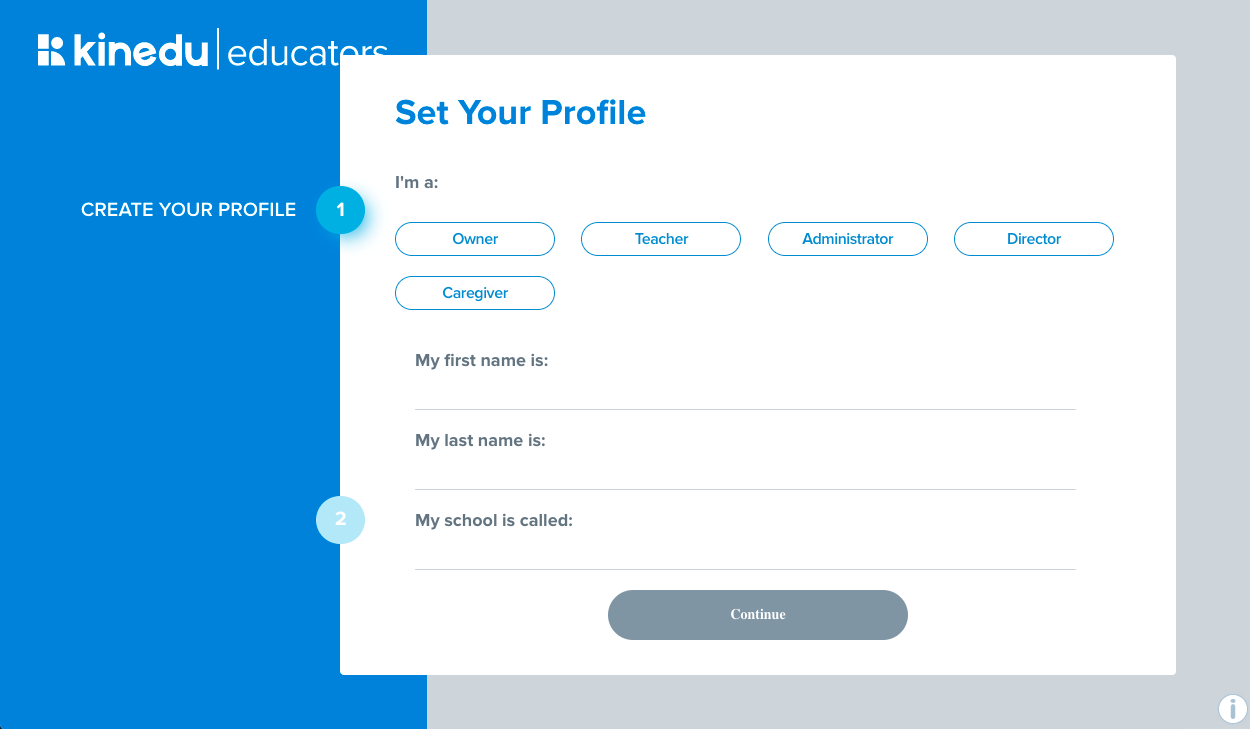
- Once you create an account, we will ask you to fill out some general information, like your role and the name of your institution. Since you are the person who created the account, you’ll have «administrator» access to all the schools and classrooms registered in the platform. The name you establish during this step will allow us to personalize the emails sent to parents and teachers.
Personalizing an activity plan
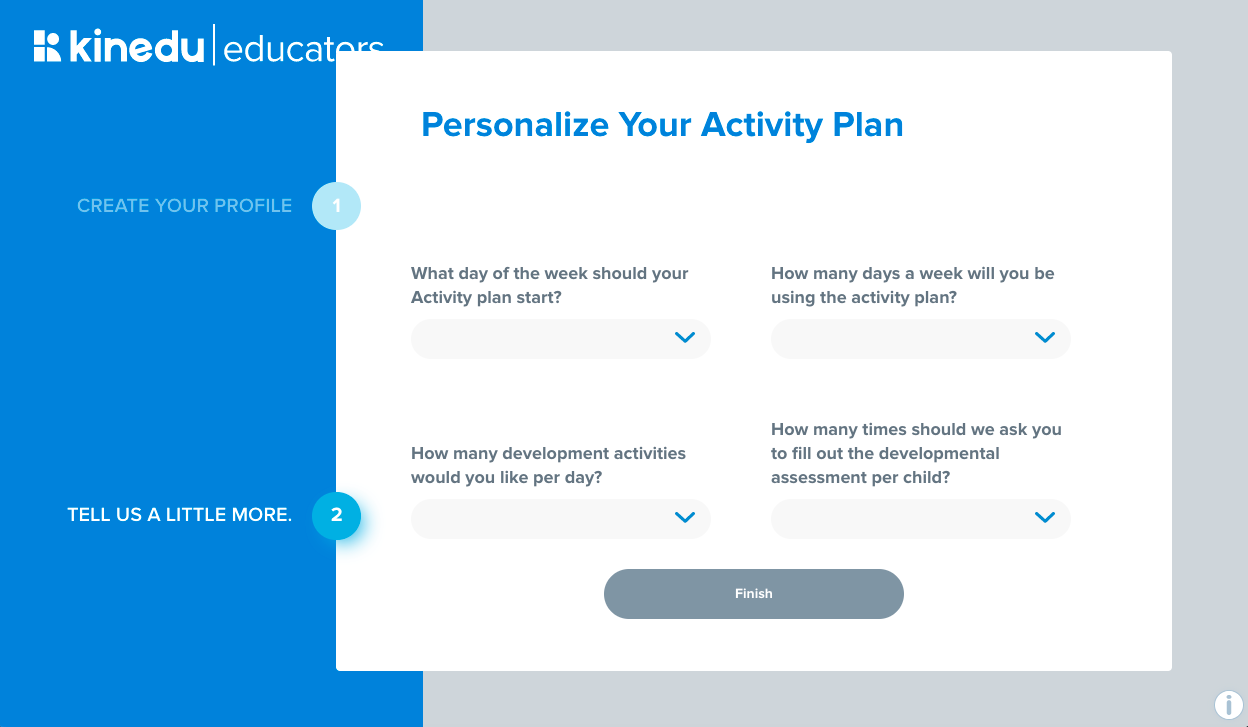
After creating a profile, we will ask you to set up an activity plan for your organization or institution.
You will need to answer these 4 questions:
- What day of the week should your Activity plan start?
- How many days a week will you be using the activity plan?
- How many development activities would you like per day?
- How many times should we ask you to fill out the developmental assessment per child?
The number of activities you choose by day is important since it will define the number of activities that the algorithm will suggest to you daily.
Completing your organization’s set up
Organization Structure
Inside Educators, you can manage the complete set up of your organization, including many different centers.
If your organization has different centers, you can access them and see their content by clicking on the “Current Center” drop-down menu, located at the bottom of the main menu.
Managing classrooms
Once you’ve registered your own account, you can finish setting up the rest of your school.
Each classroom needs an assigned teacher that will have access to activities and information about students. A classroom can have more than one teacher.
Adding classrooms
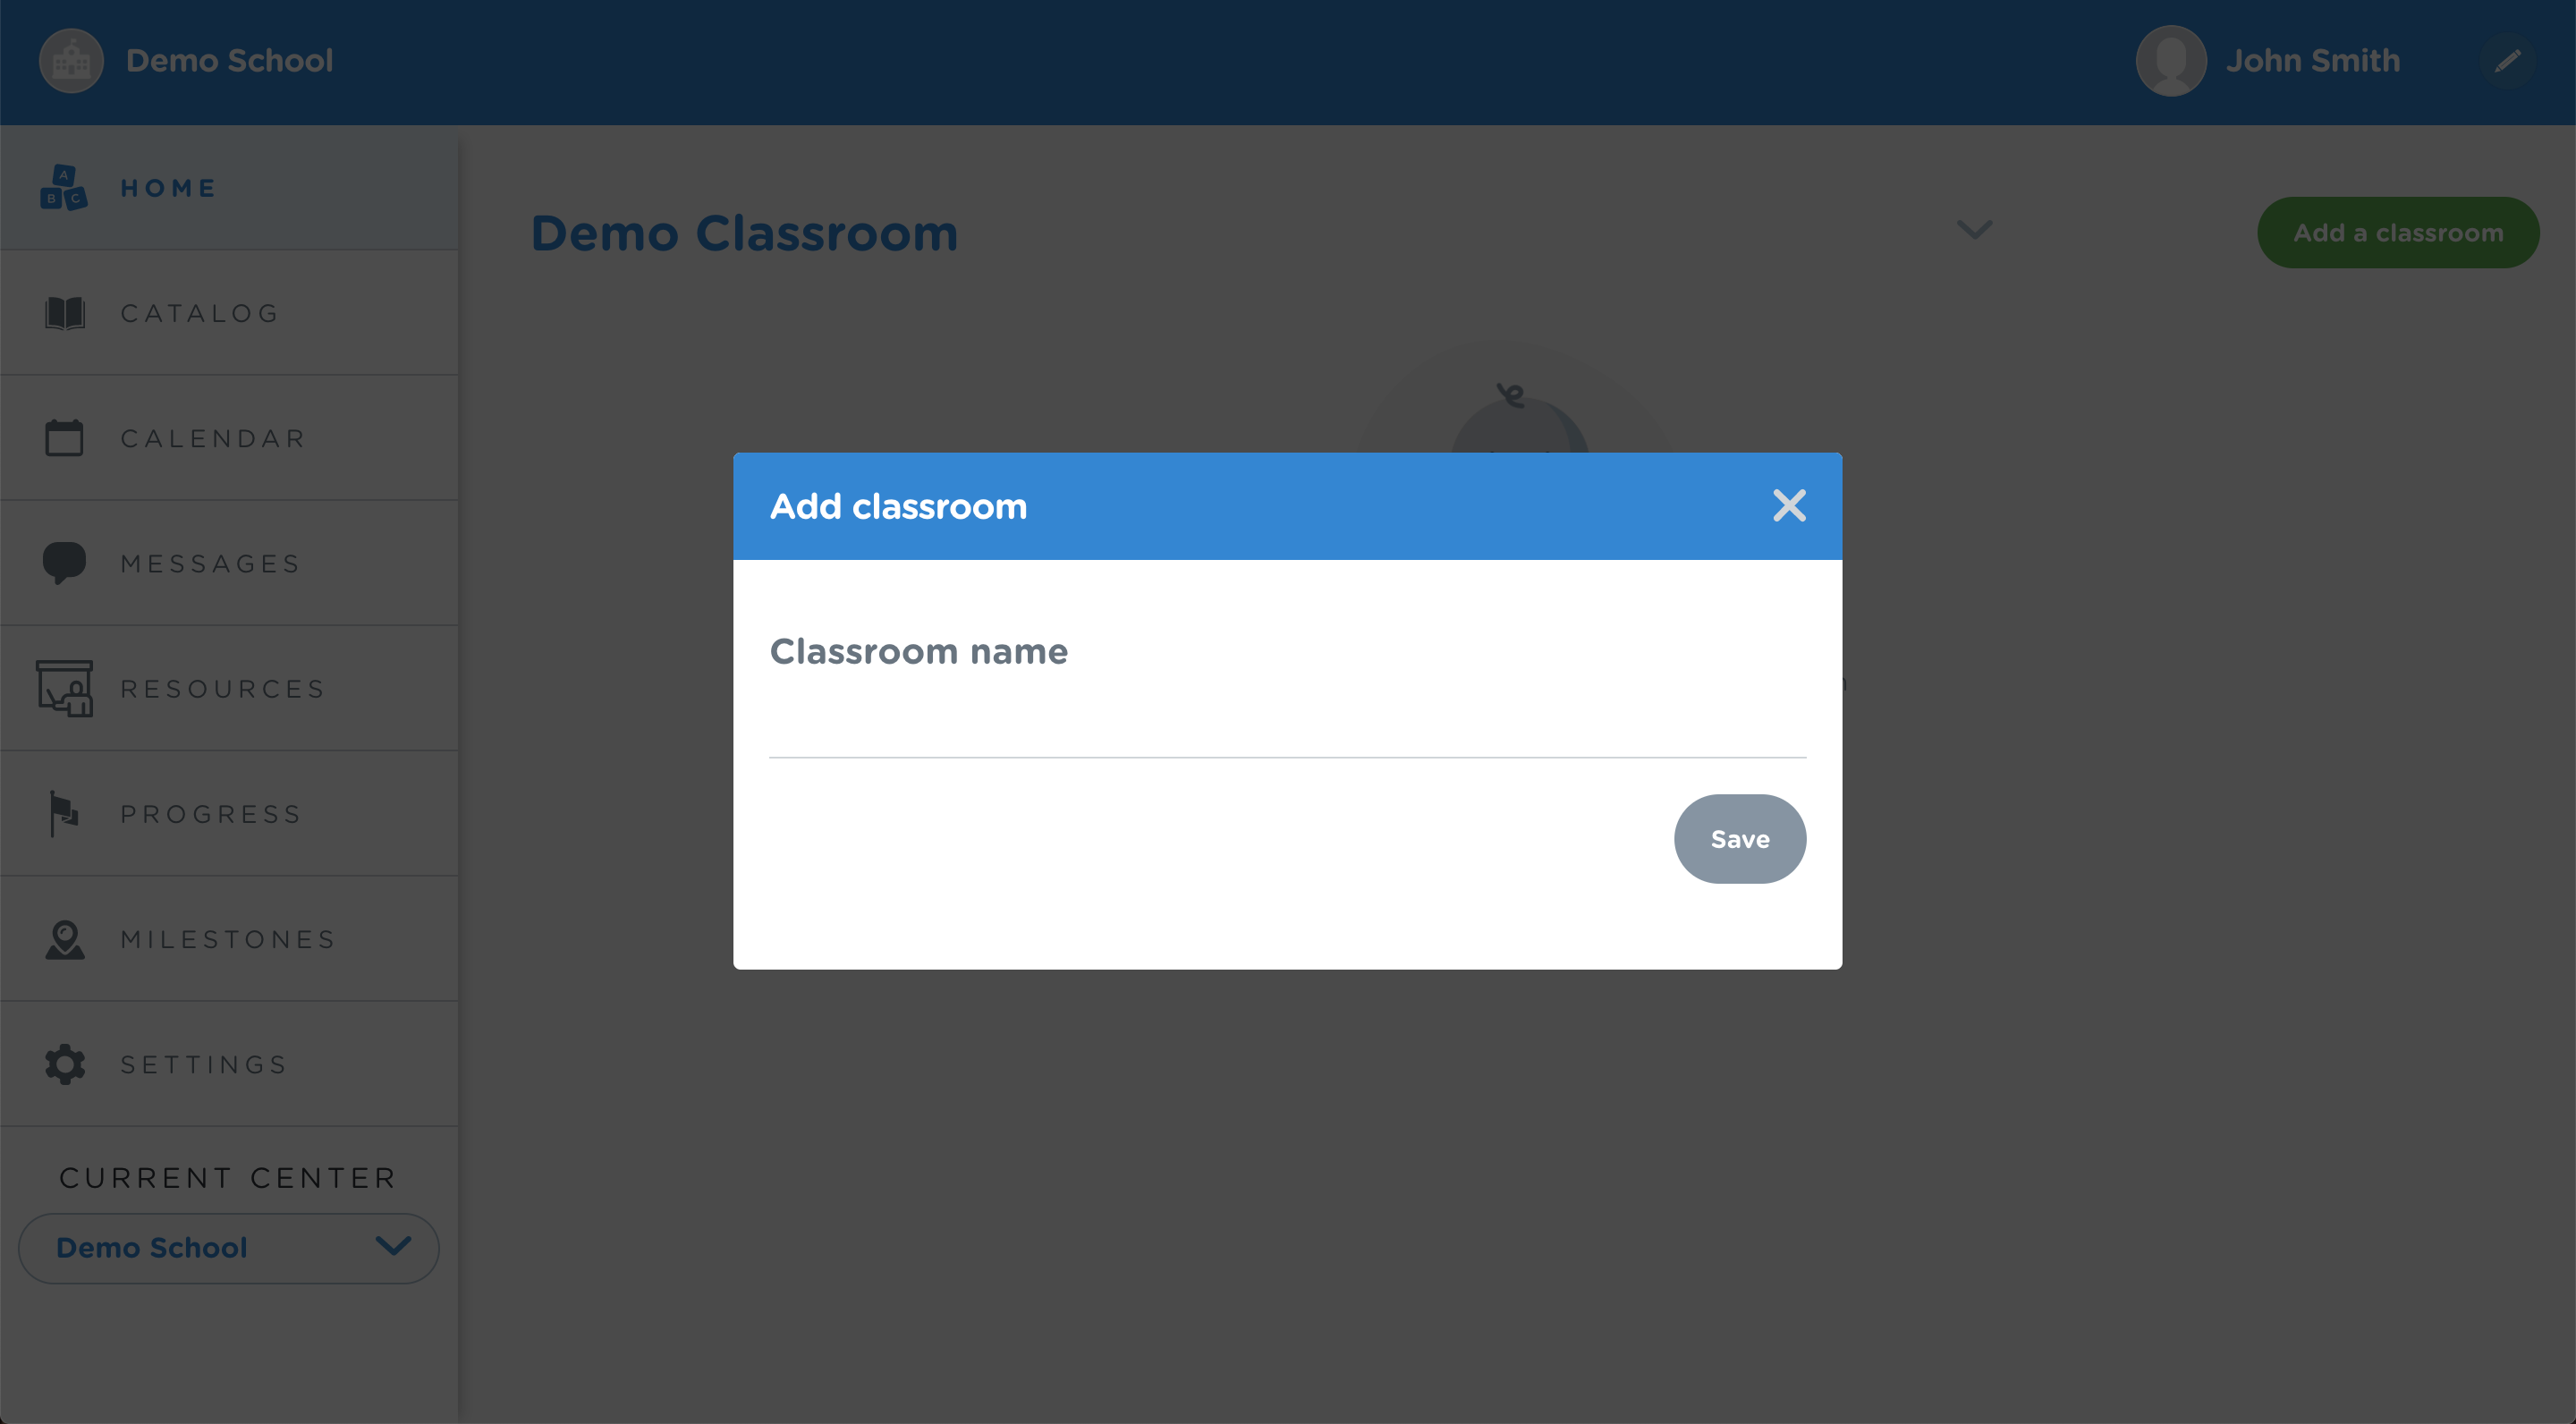
To add a classroom, click on the “Add Classroom” button. Type the name of the new classroom and then click “Save”.
You can also add classrooms from the Settings section:
- Head to the Settings section of the menu, on the left side.
- Select the Schools tab.
- Select the center where you want to add a classroom.
- Click the Add classroom button.
- Enter the name of the classroom, and you’re done! The classroom has been added to the center.
There are two ways of moving students from one classroom to another:
- Go into the students’ profile and move it to another classroom in the same center.
- Go into the classroom from the Settings section, and select the students you want to move. You can change them to another classroom or to another center.


Adding collaborators
To invite collaborators, first, you need to know the types of collaborators you can add:
Types of collaborators
- Administrators: These are the collaborators that manage an organization’s operations (which can be made up of one or many centers).
- Directors: These are the collaborators that usually only manage one center, and thus can only see the center they’re assigned to. Unlike Administrators, Directors can’t see all the centers that are part of the organization.
- Teachers: Teachers are the collaborators assigned to specific classrooms. They can be assigned to more than one classroom, but they can only see the information of the students assigned to their classroom.
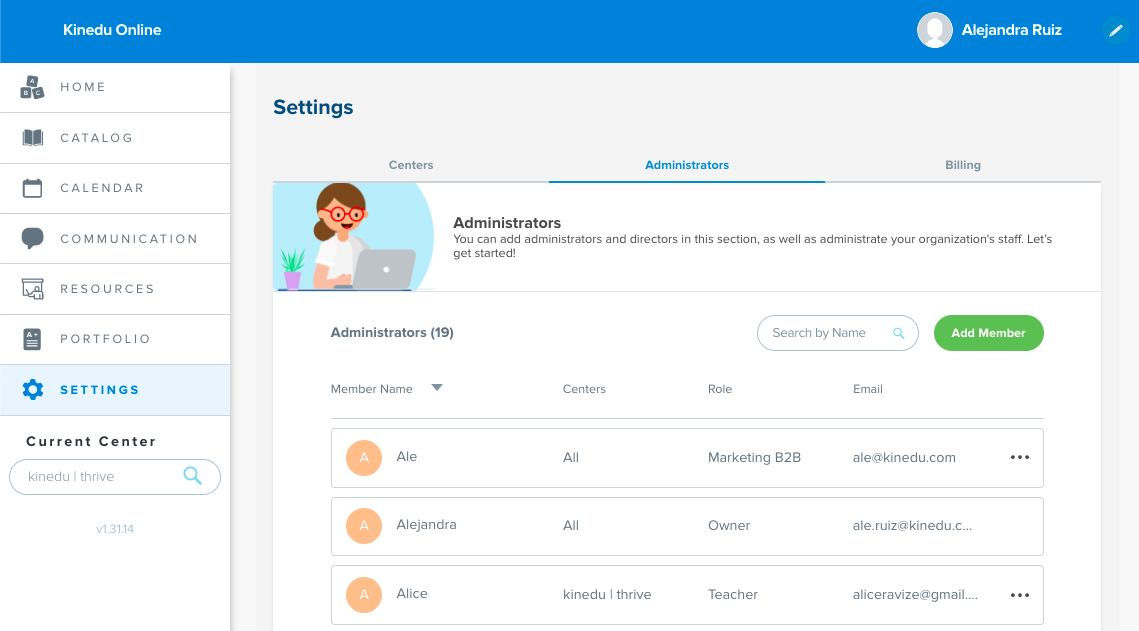
Adding administrators
- Head to the Settings section.
- Select the Administrators tab.
- Click on “Add member”.
- Fill out the information.
- Select if you’re adding an Administrator or Director.
- You can change the name of the position, and you’ll be done! The new collaborator will receive an email notification inviting them to collaborate on your center.
Important:The collaborator must create the account using the email where they received the invitation, to avoid creating duplicate accounts.
Adding directors
There are two ways of adding directors:
“Administrators” tab:
- Head to the Settings section.
- Select the Administrators tab.
- Click on “Add member”.
- Fill out the information.
- Select if you’re adding an Administrator or Director (you can change the name of the position).
- Select the special permits.
- Select the centers they’ll be added to, and you’ll be done! They will receive an email invitation to collaborate on the center.

“Centers” tab:
- Head to the Settings section.
- Enter the center where you want to add a new director.
- Enter the Directors tab.
- Click on Add directors.
- Enter the director ‘s information (you can also change the name of the position).
- Select the special permits.
- Select the schools the director will be assigned to, and you’ll be done! They will get an email invitation to collaborate.

Adding teachers
There are two ways of adding teachers:
“Teachers” tab – within a center:
- Go to the Settings section.
- Enter the center where you want to add the teacher.
- Select the Teachers tab.
- Click on “Add teacher”.
- Enter the teacher’s information.
- You can change the name of the position and select special permits.
- Select the center and classrooms you want to add the teacher to, and you’ll be done! The teacher will get an email invitation to join the center.

“Teachers” tab – within a classroom:
- Head to the Settings section.
- Enter the center where you want to add a teacher.
- Select the classroom where you want to add the teacher.
- Select the teacher’s tab.
- Click on Add teacher.
- Enter the teacher’s information.
- You can change the name of the position and select special permits.
- Select the center and classrooms that the teacher will belong to, and you’l be done! The teacher will receive an email invitation to join your center.

Important: Collaborators must create their account using the email address where they received the invitation, so that there aren’t any duplicate accounts.
Editing collaborators
Once a user has been created, either as a collaborator or as a teacher, you can edit their information. In the case of teachers and directors, you can edit their information, change the classrooms or center they’re assigned to, and the permits they have.
Editing administrators and directors
- Go to the Settings section.
- Go to the Administrators tab.
- Select the administrator or director you want to edit.
- The admin or director’s profile will appear.
- In the admin ‘s case, you can edit the profile information and see the predetermined permits on the Settings tab.
- In the director ‘s case, you can edit the information, the centers they’re assigned to, and the special permits.
- Click on Save to save the changes

Editing directors and teachers
- Go to the Settings section.
- Select the school that the director or teacher belong to.
- Select the Directors or Teachers tab.
- Select the director or teacher you want to edit.
- Their profile will appear.
- You can edit the collaborators profile information, and their centers or classrooms.
- You can go to the Settings tab to edit their special permits.
- Click on Save to save the changes.

Moving collaborators
You have the option of moving collaborators from one center to another if they’re directors, and from centers and classrooms if they’re teachers. You can move many collaborators at once, or one at a time.
- Go to the Settings section.
- Select the school that the collaborators currently belong.
- Select the Directors or Teachers tab.
- Select the collaborators you want to move.
- Select the new center or classroom you want to move them to.
- All done! the collaborators will appear on the school or classroom you selected.

Managing students
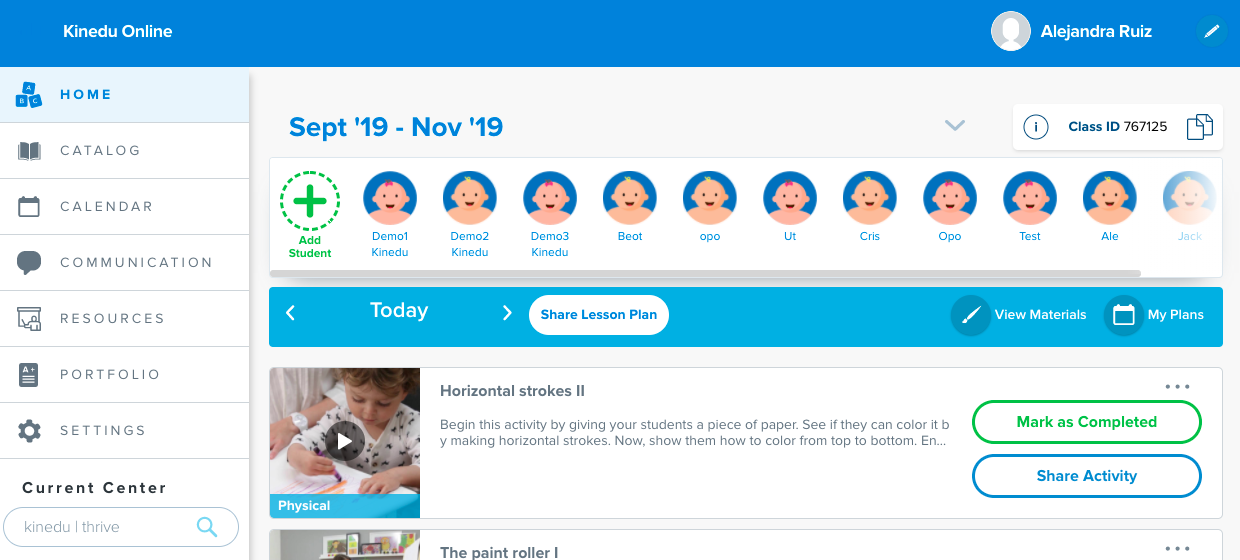
Adding students and parents
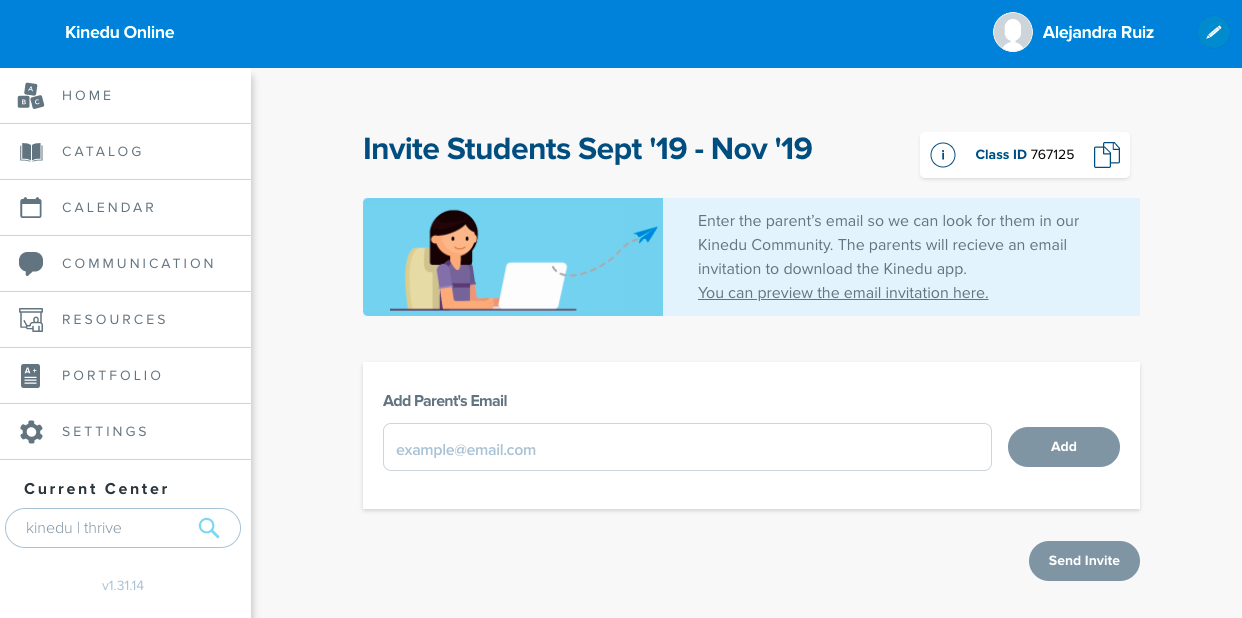
You can add new students from the home page by clicking on the “Add student” button.
- Type in the email of one of the parents of the student you wish to add and type in their information. (If the parents already have a Kinedu account, our system will automatically recognize it and add the family’s information.)
- All done! An invitation with a code will be sent to the student’s parents.
It’s important to keep in mind that you can only invite one parent per student. For another parent to have access to their child’s profile, the parent who got the initial invitation will have to invite the other parent through the Kinedu app.
IMPORTANT NOTE: Make sure you have your director or coordinator’s permission before inviting a new student, since your school will be charged for license use.
To find out more about the steps that parents need to follow, you can read the parents’ manual here.
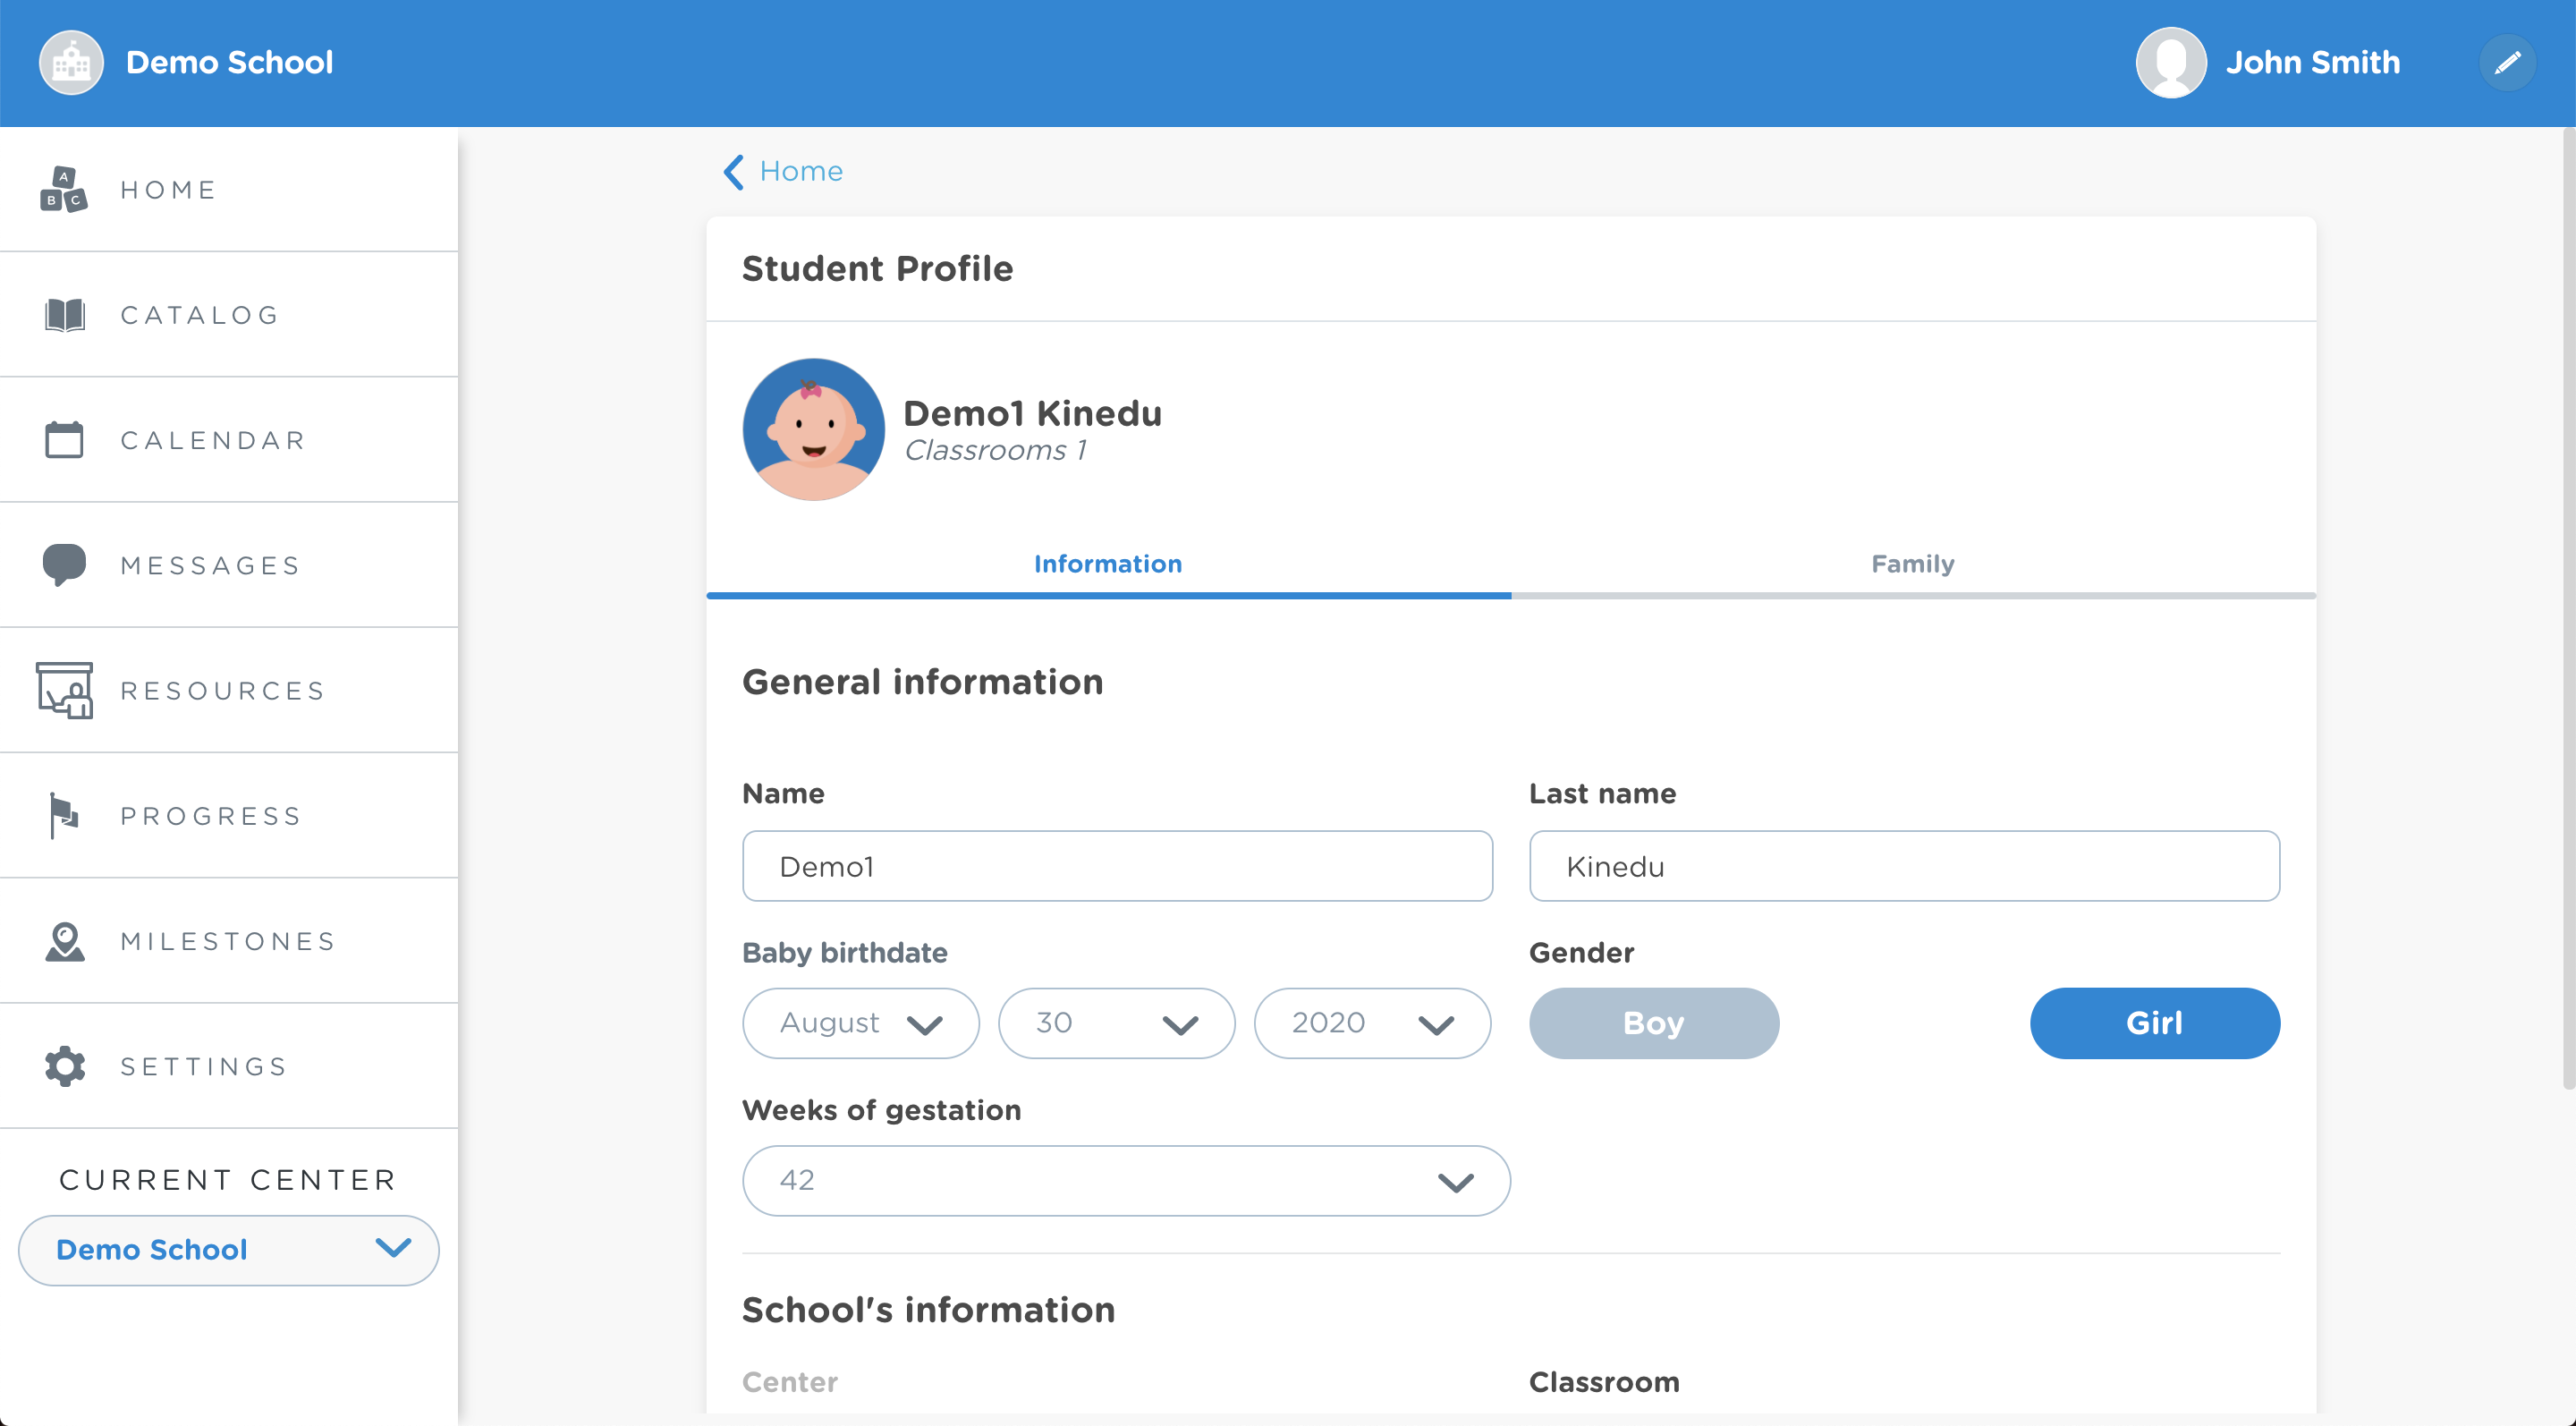
Student profiles
You can access a student’s profile by clicking on their icon, either from the homepage or from the classroom section on Settings. When you click on their icon, a screen with all their information will appear.
You will be able to see a “Publications” tab, where you’ll have access to the history of shared materials and communications with the student’s parents. You will also see a “Portfolio” tab, where you can check the evidence sent by the parents.
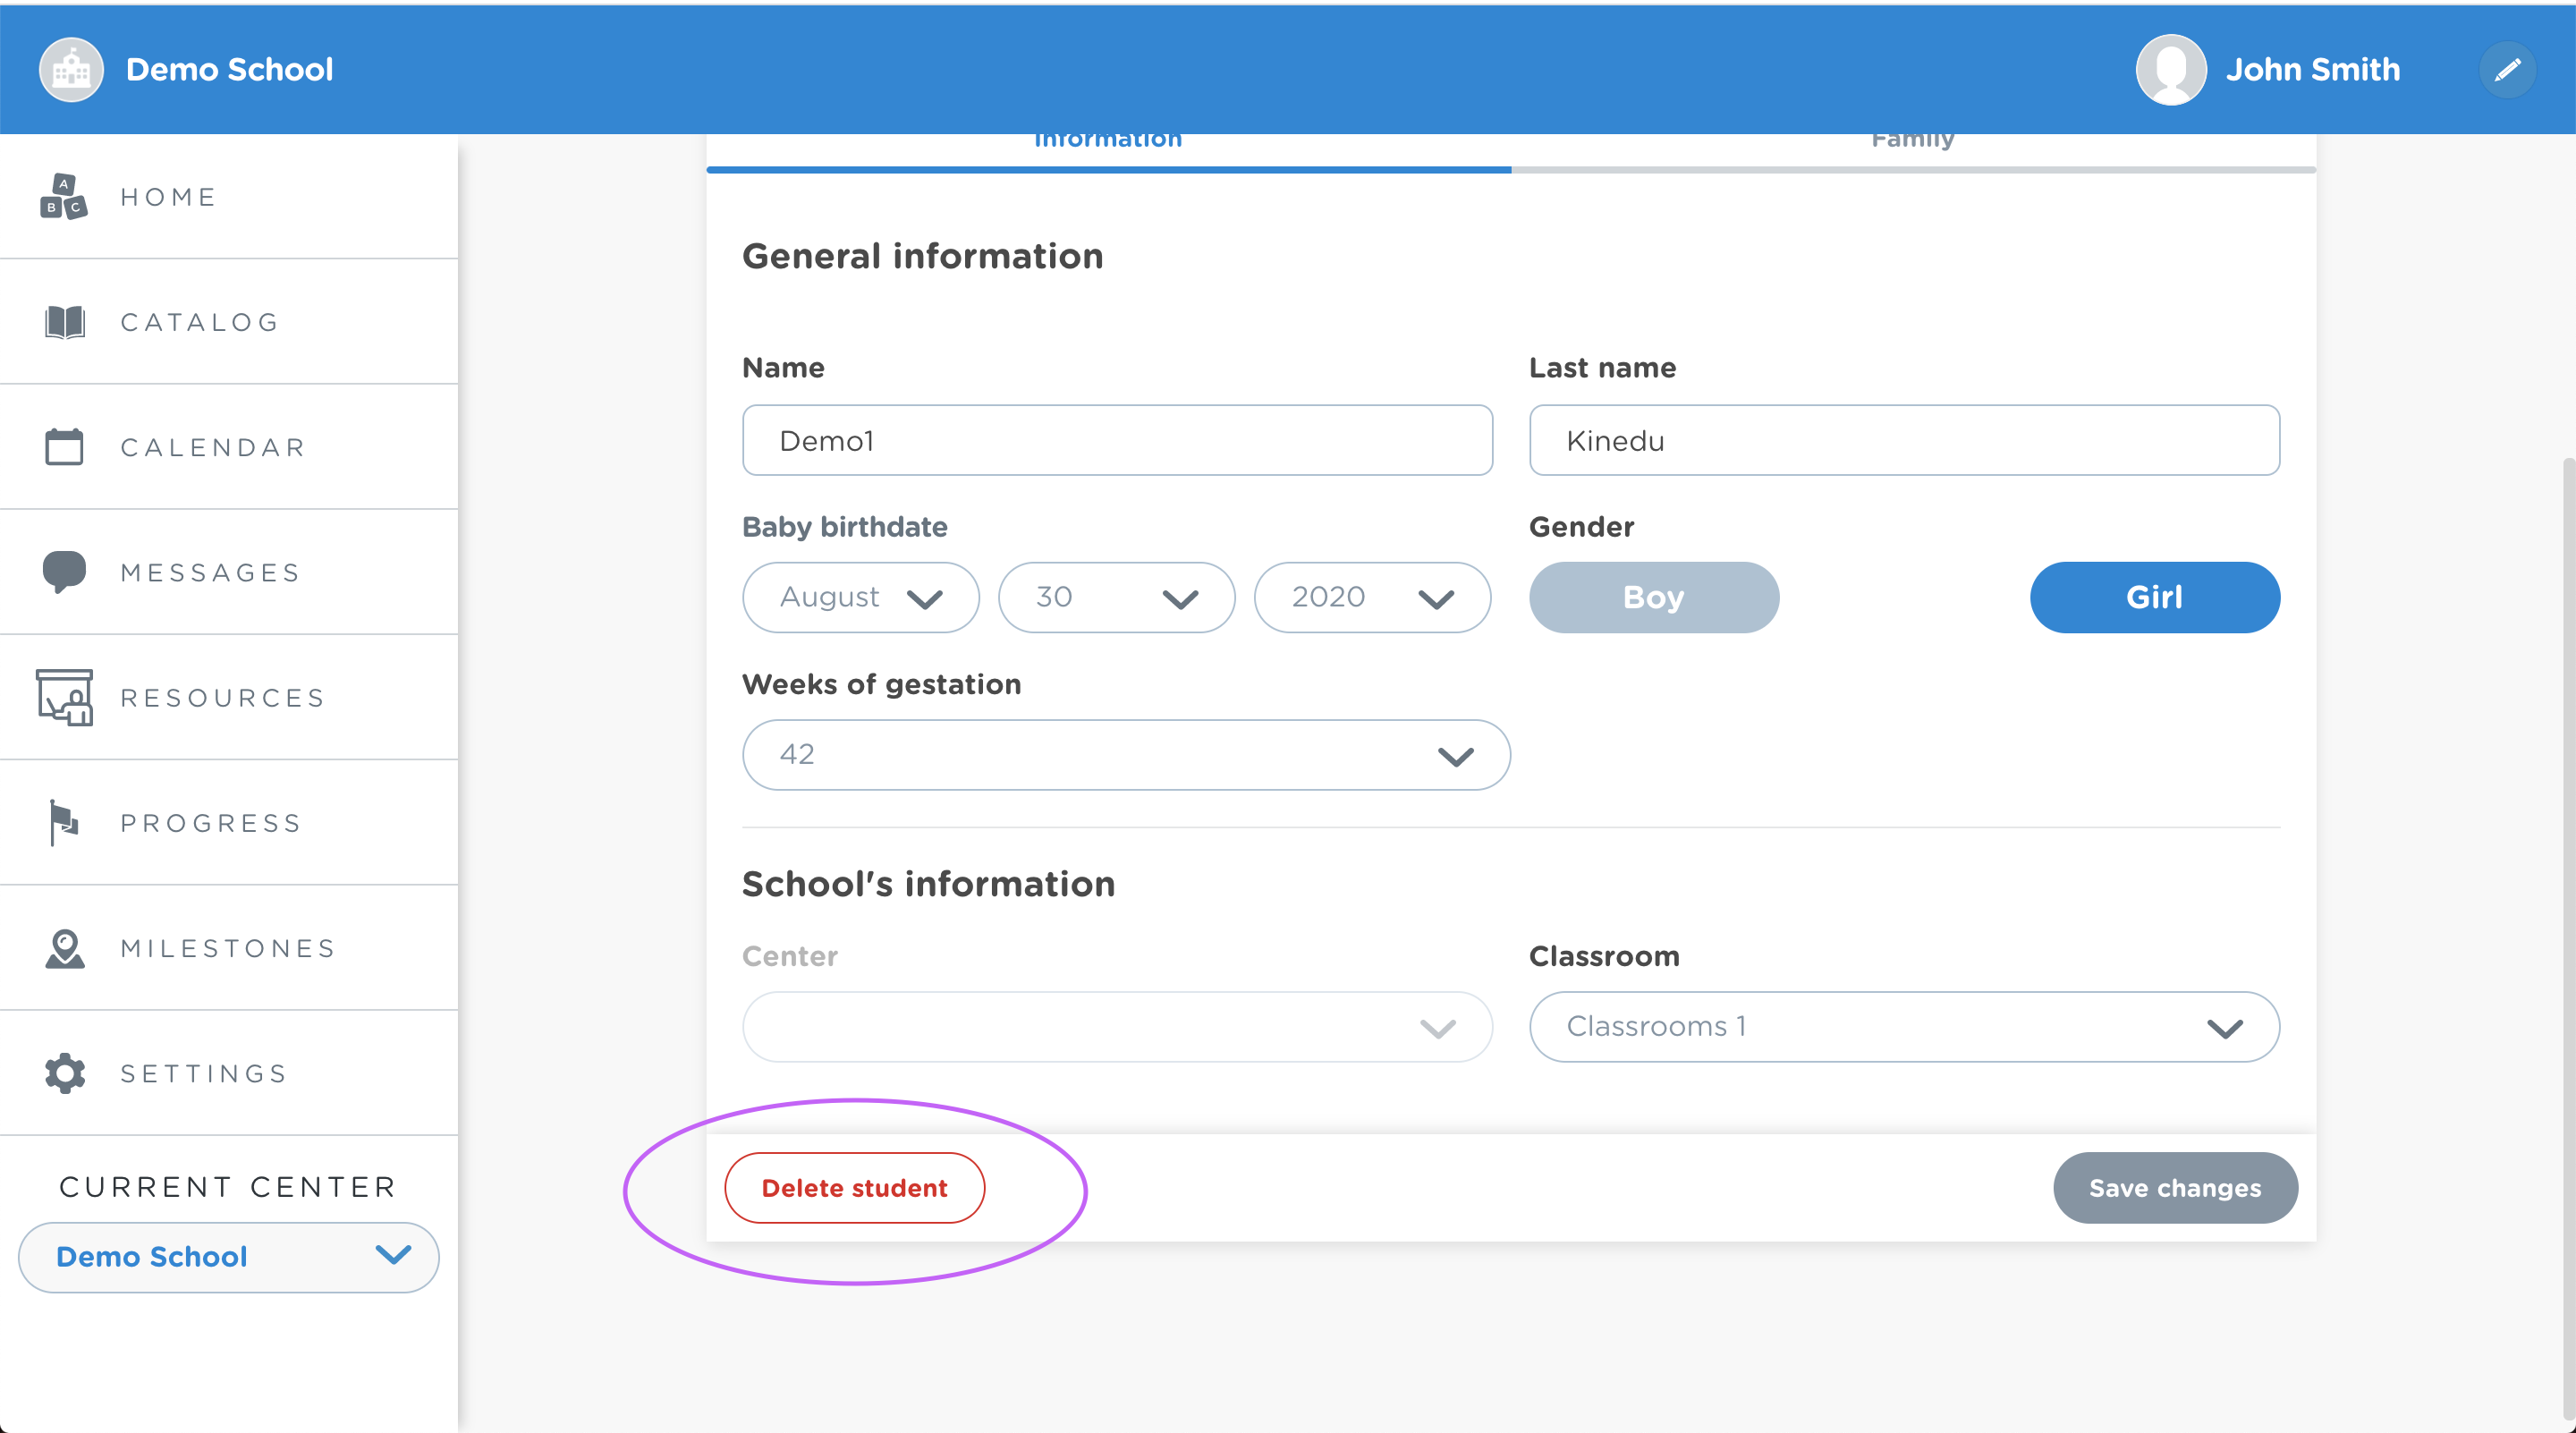
Deleting Student Profiles
To delete a profile, head to the bottom part of a student’s profile, and click on the «Delete student» button. Both admins and directors can delete student profiles, but teachers can only delete students who belong to their classrooms, as long as this permit is enabled.
Activity plan
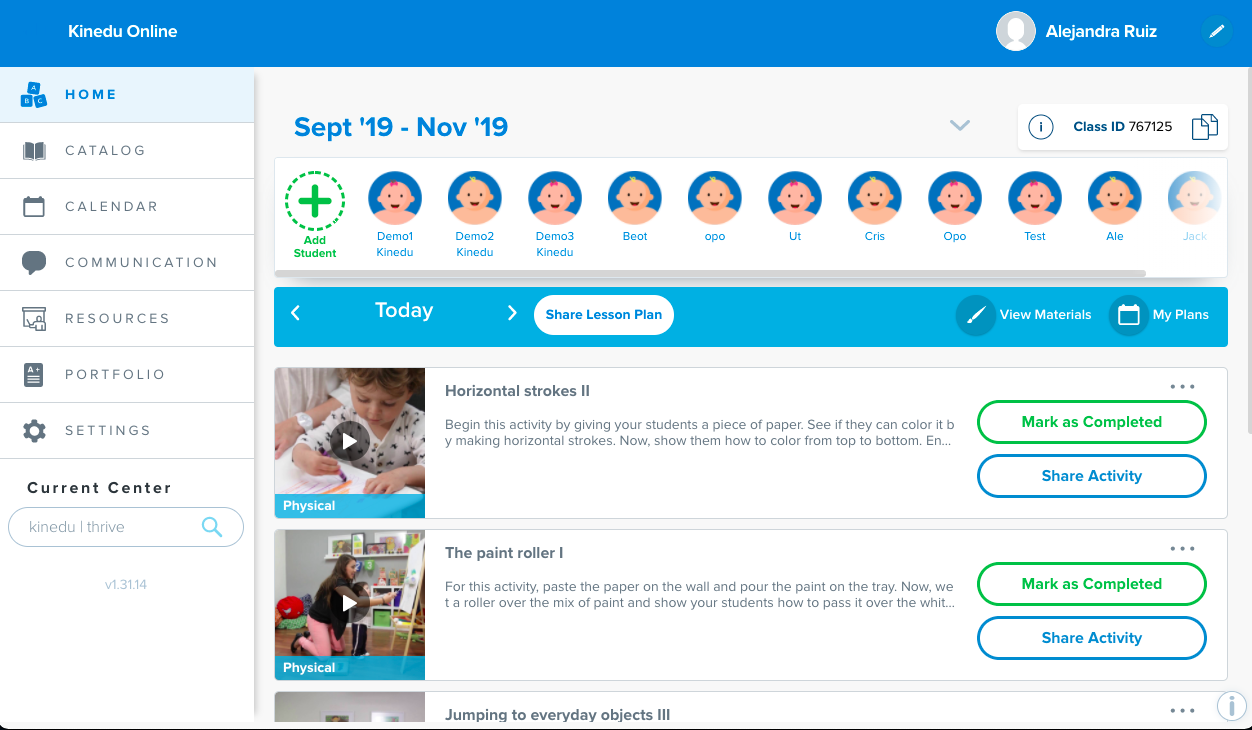
You will find the daily activity plan on the main menu of the home page. All the students that are listed in your groups and linked to a classroom will be able to see the weekly plan automatically in their Kinedu app, without you having to share it with each of them.
Any changes made to the weekly plan will automatically be reflected on the parents’ app. They will also be able to see future and past plans. It will no longer be necessary to share the plan with them every week, all the parents linked to your classroom will be able to see the planned activities.
To see your current, past and future plans, which the parents will also have access to:
- Select “My plans” on the home page.
- Done! You’ll see three tabs where you can visualize present, future and past activities.

Communication
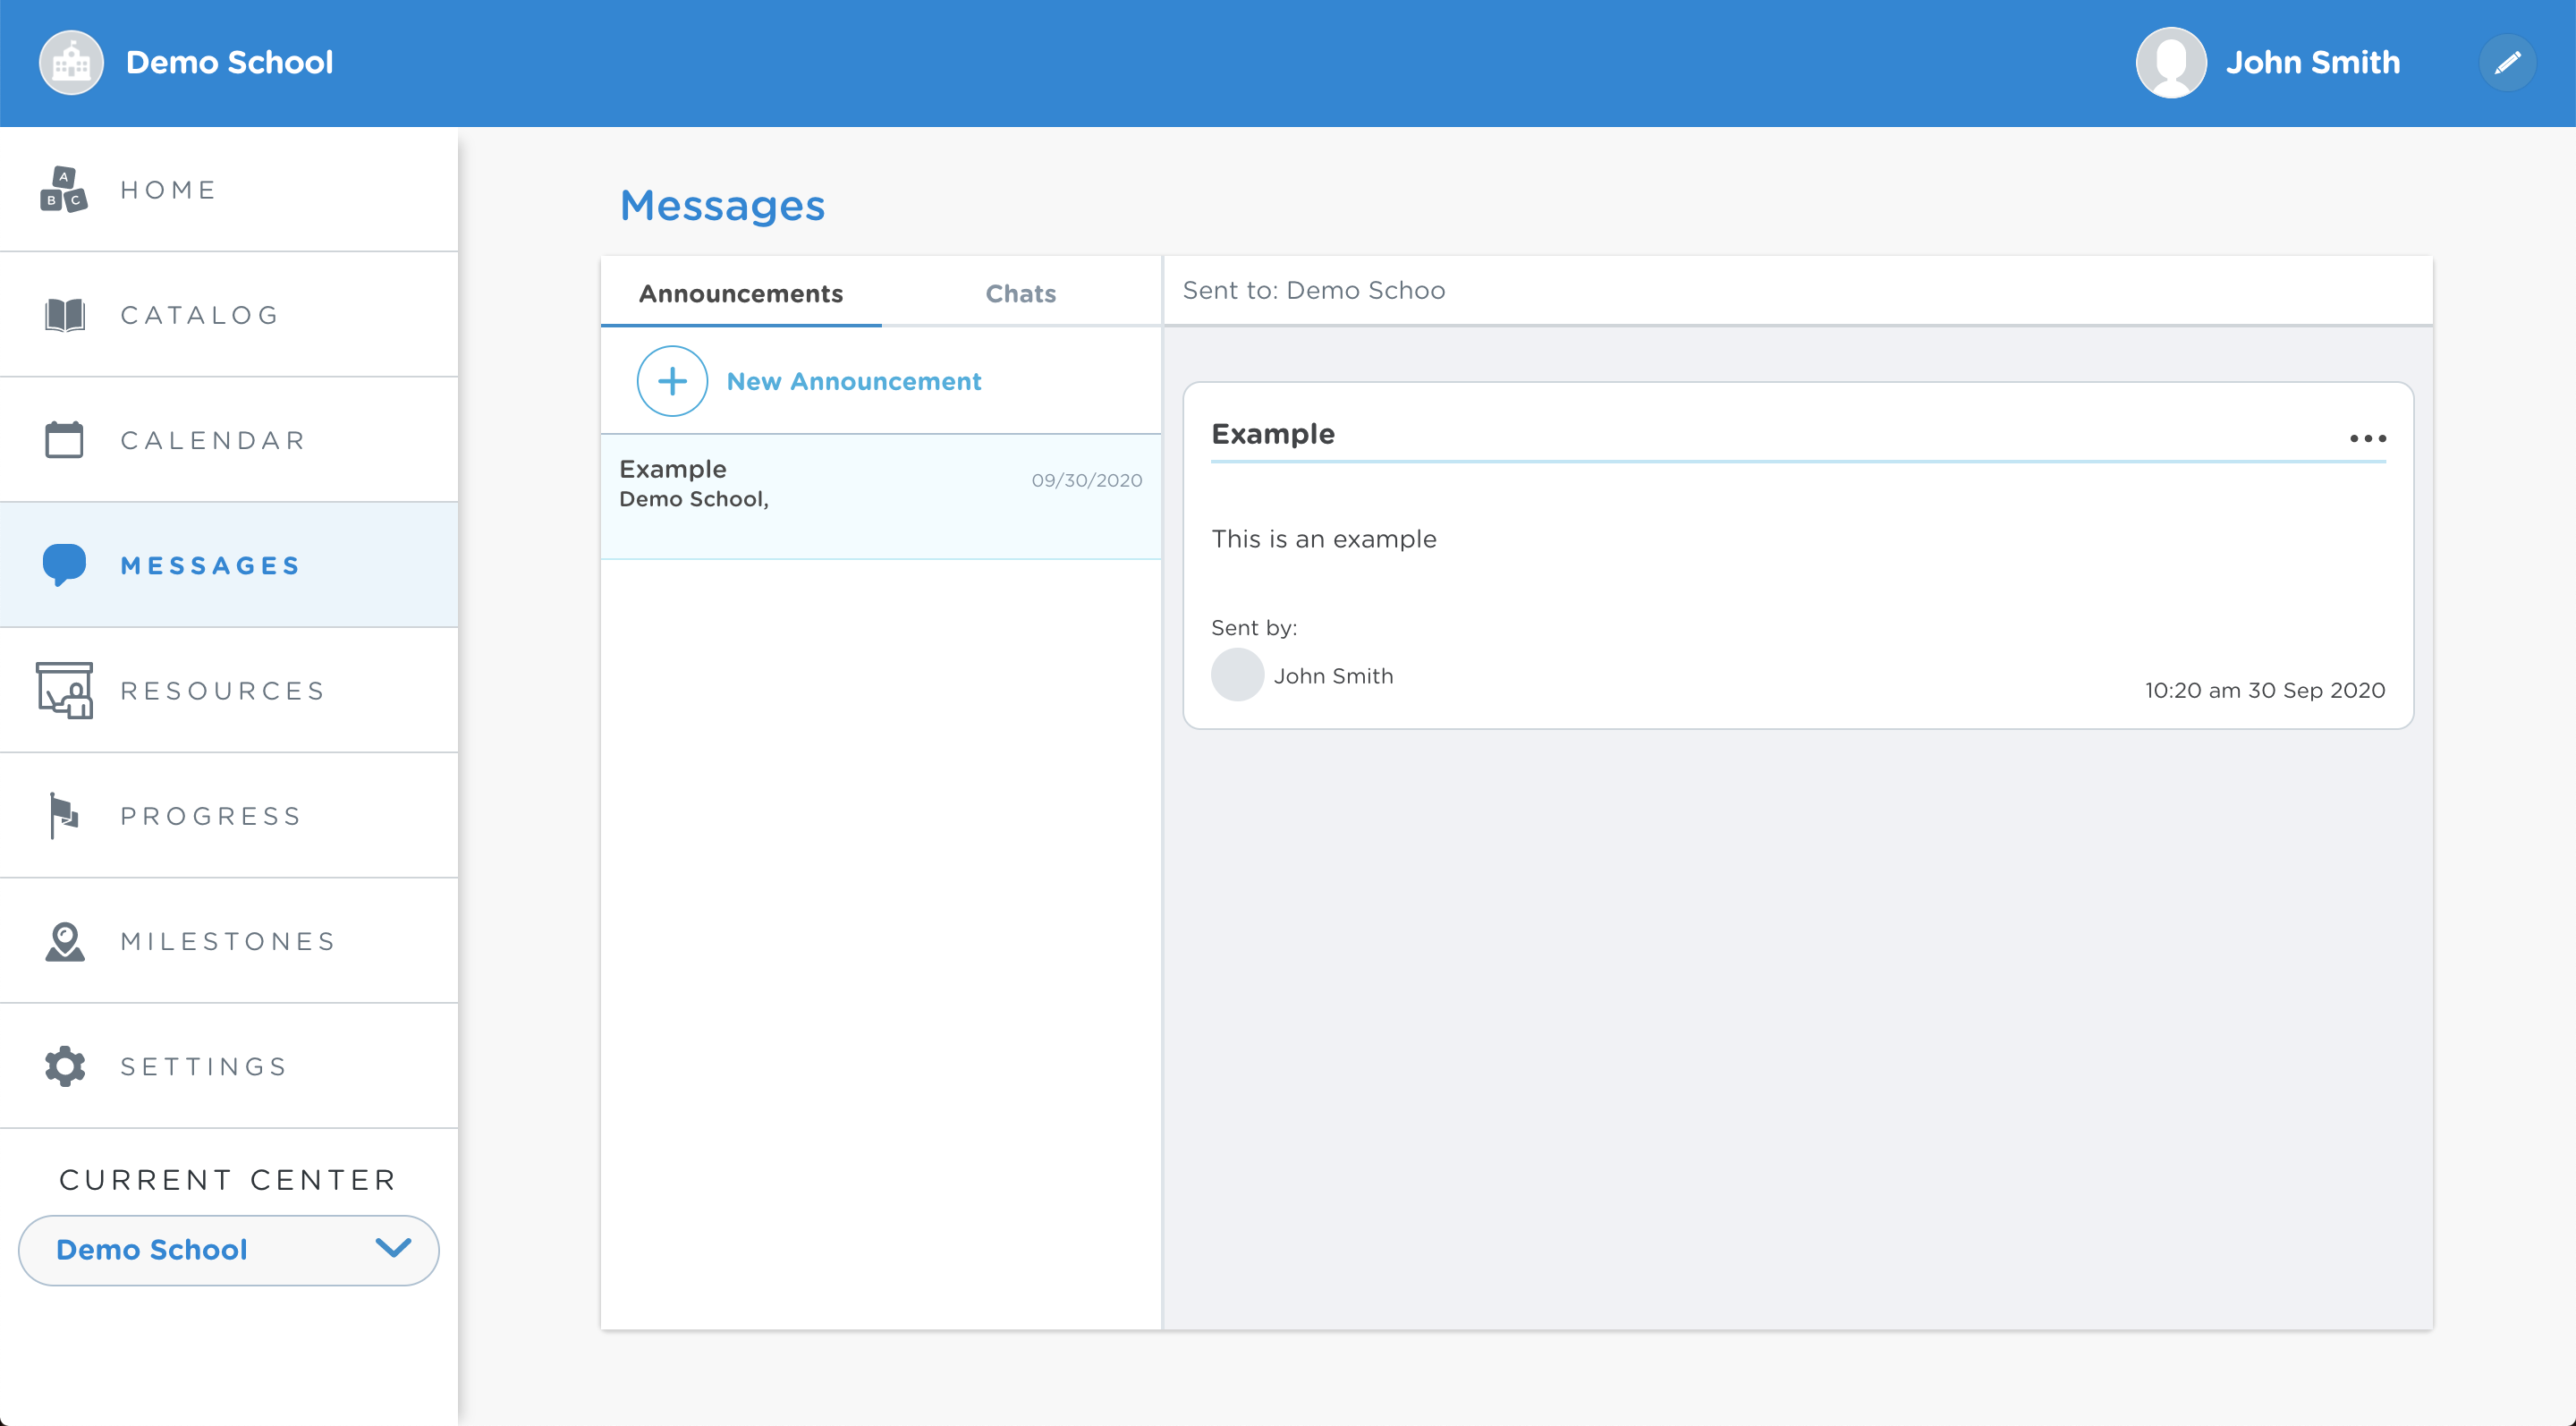
Announcements
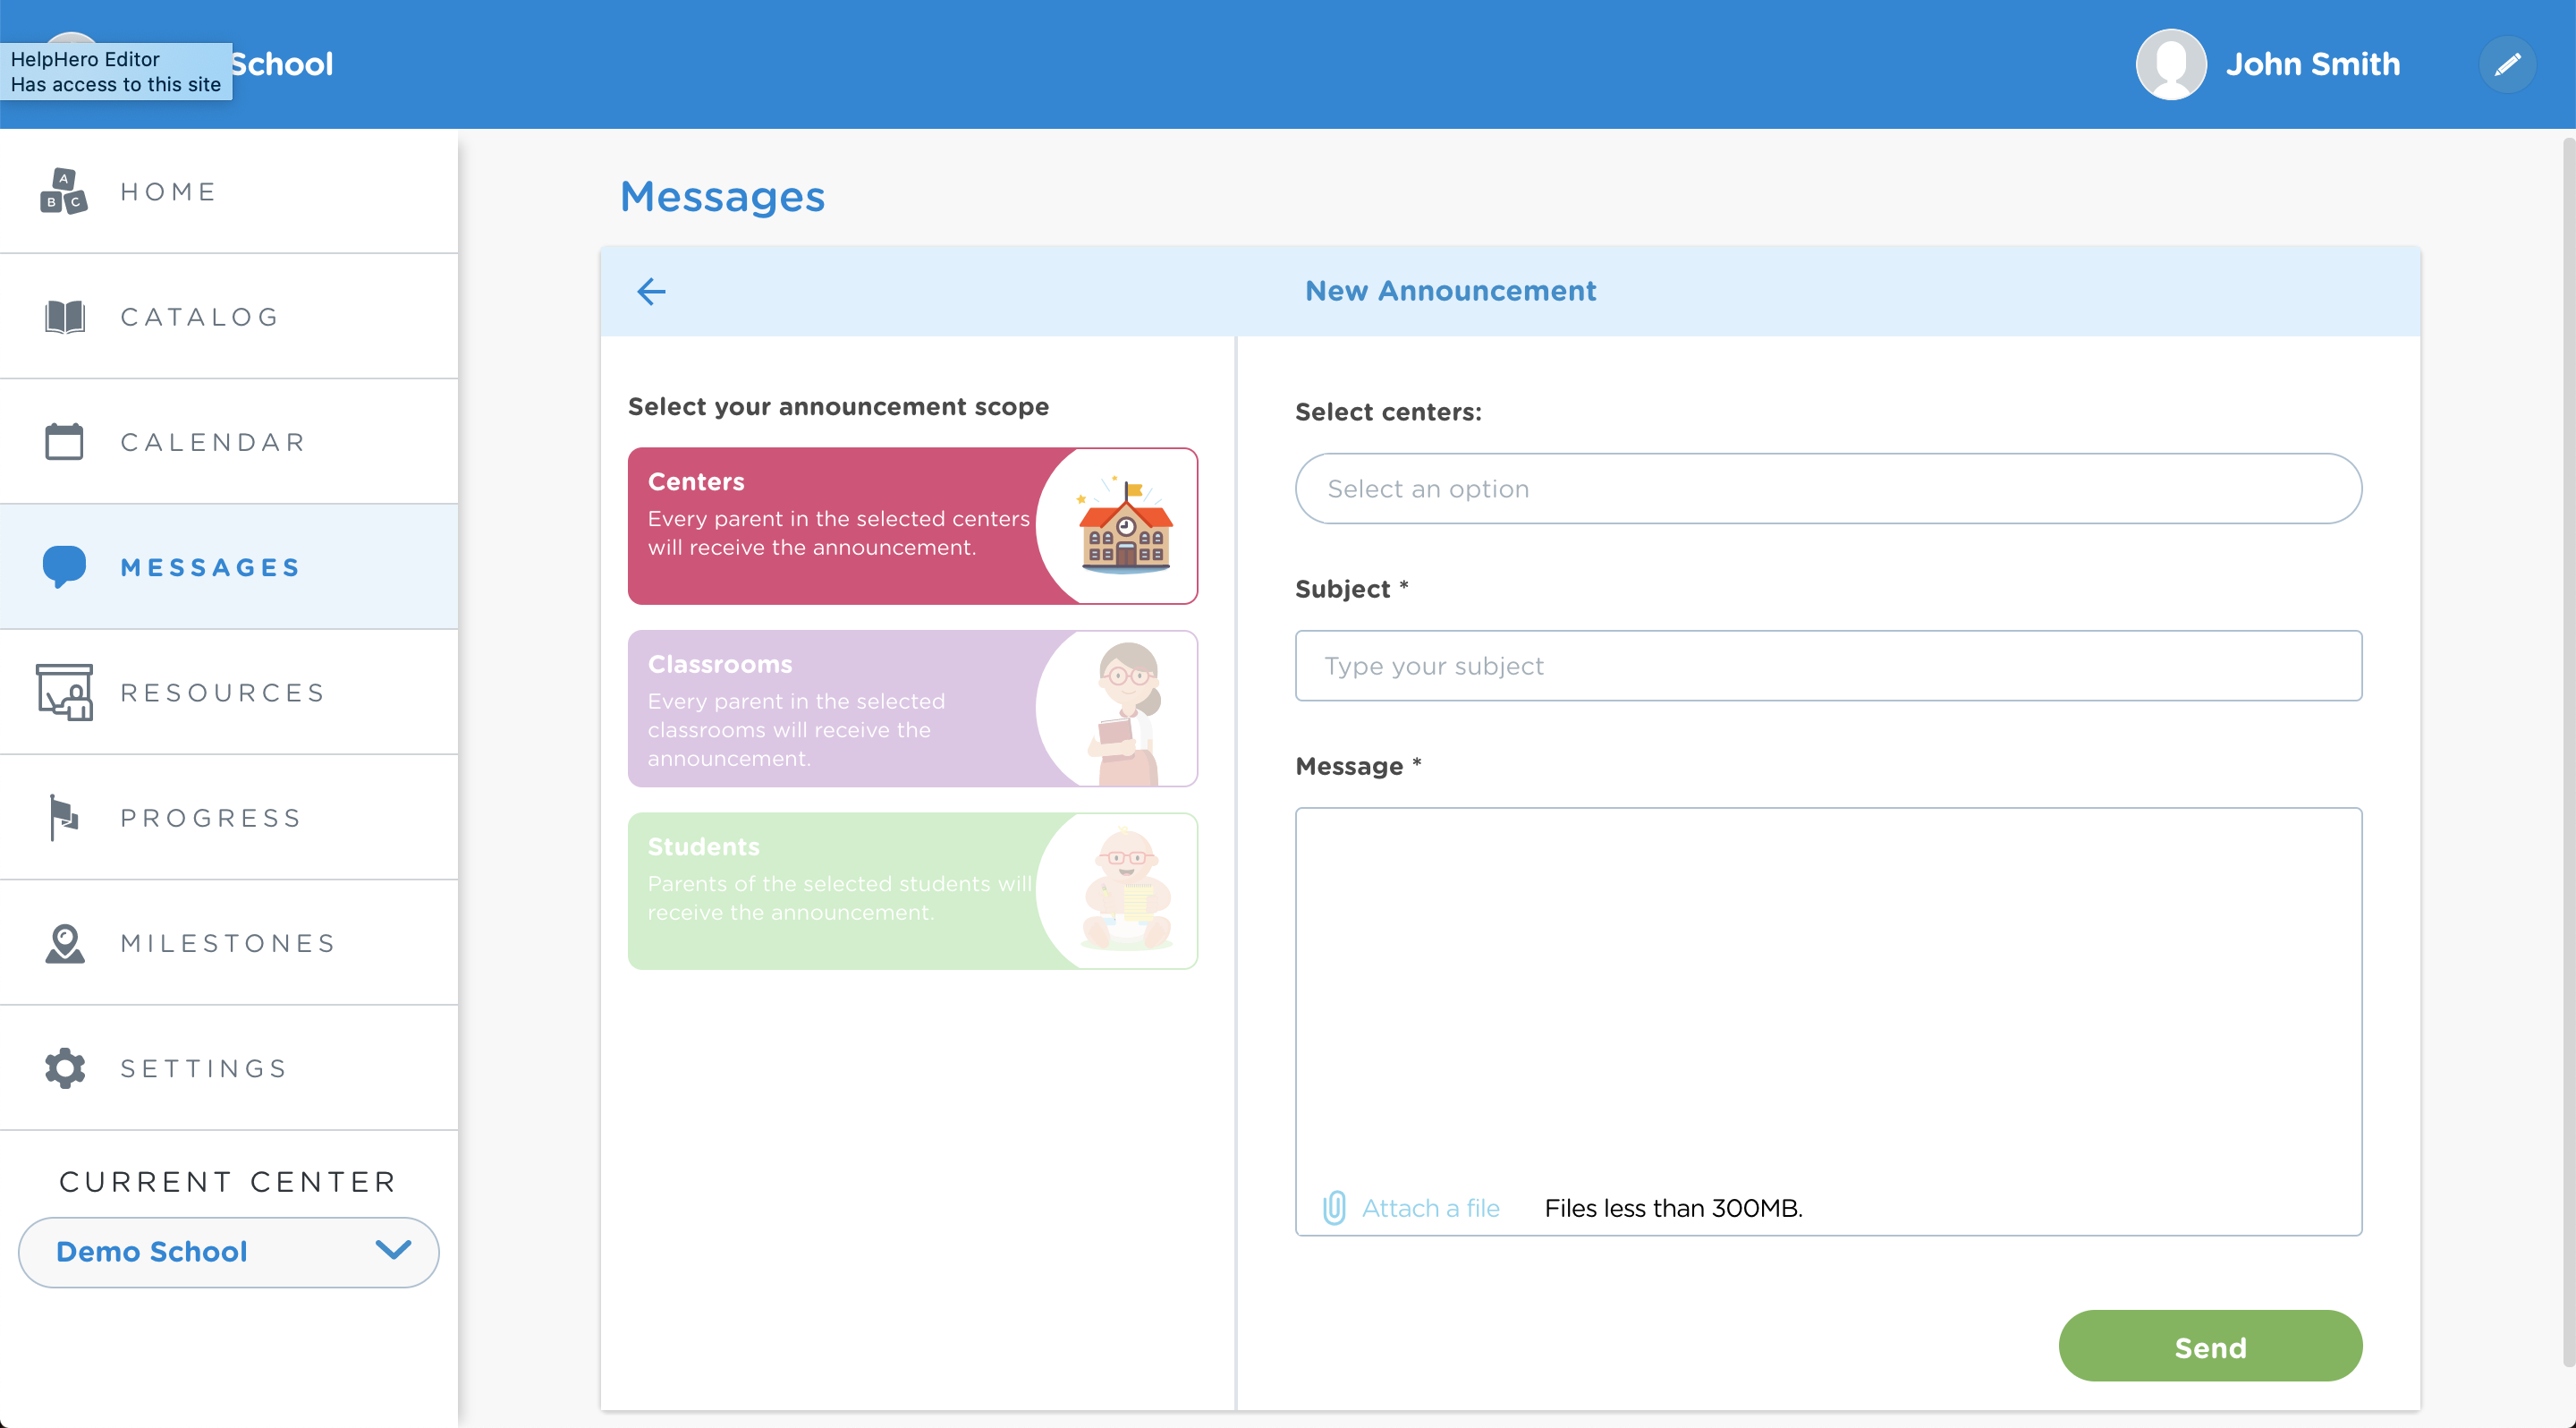
Announcements are messages that you send to every parent in your school. To send out an announcement select the “Messages” section on the left-hand menu.
Select the recipient you want to send the notice or message to, choose a subject, and write the message. You can attach documents (PDFs, images, etc. that weigh up to 10MB) and include links in your messages.
Deleting Announcements
If you want to delete a notice or message you can do it by clicking on the three dots that appear on the upper right corner of the message, where the “Delete” option will appear.
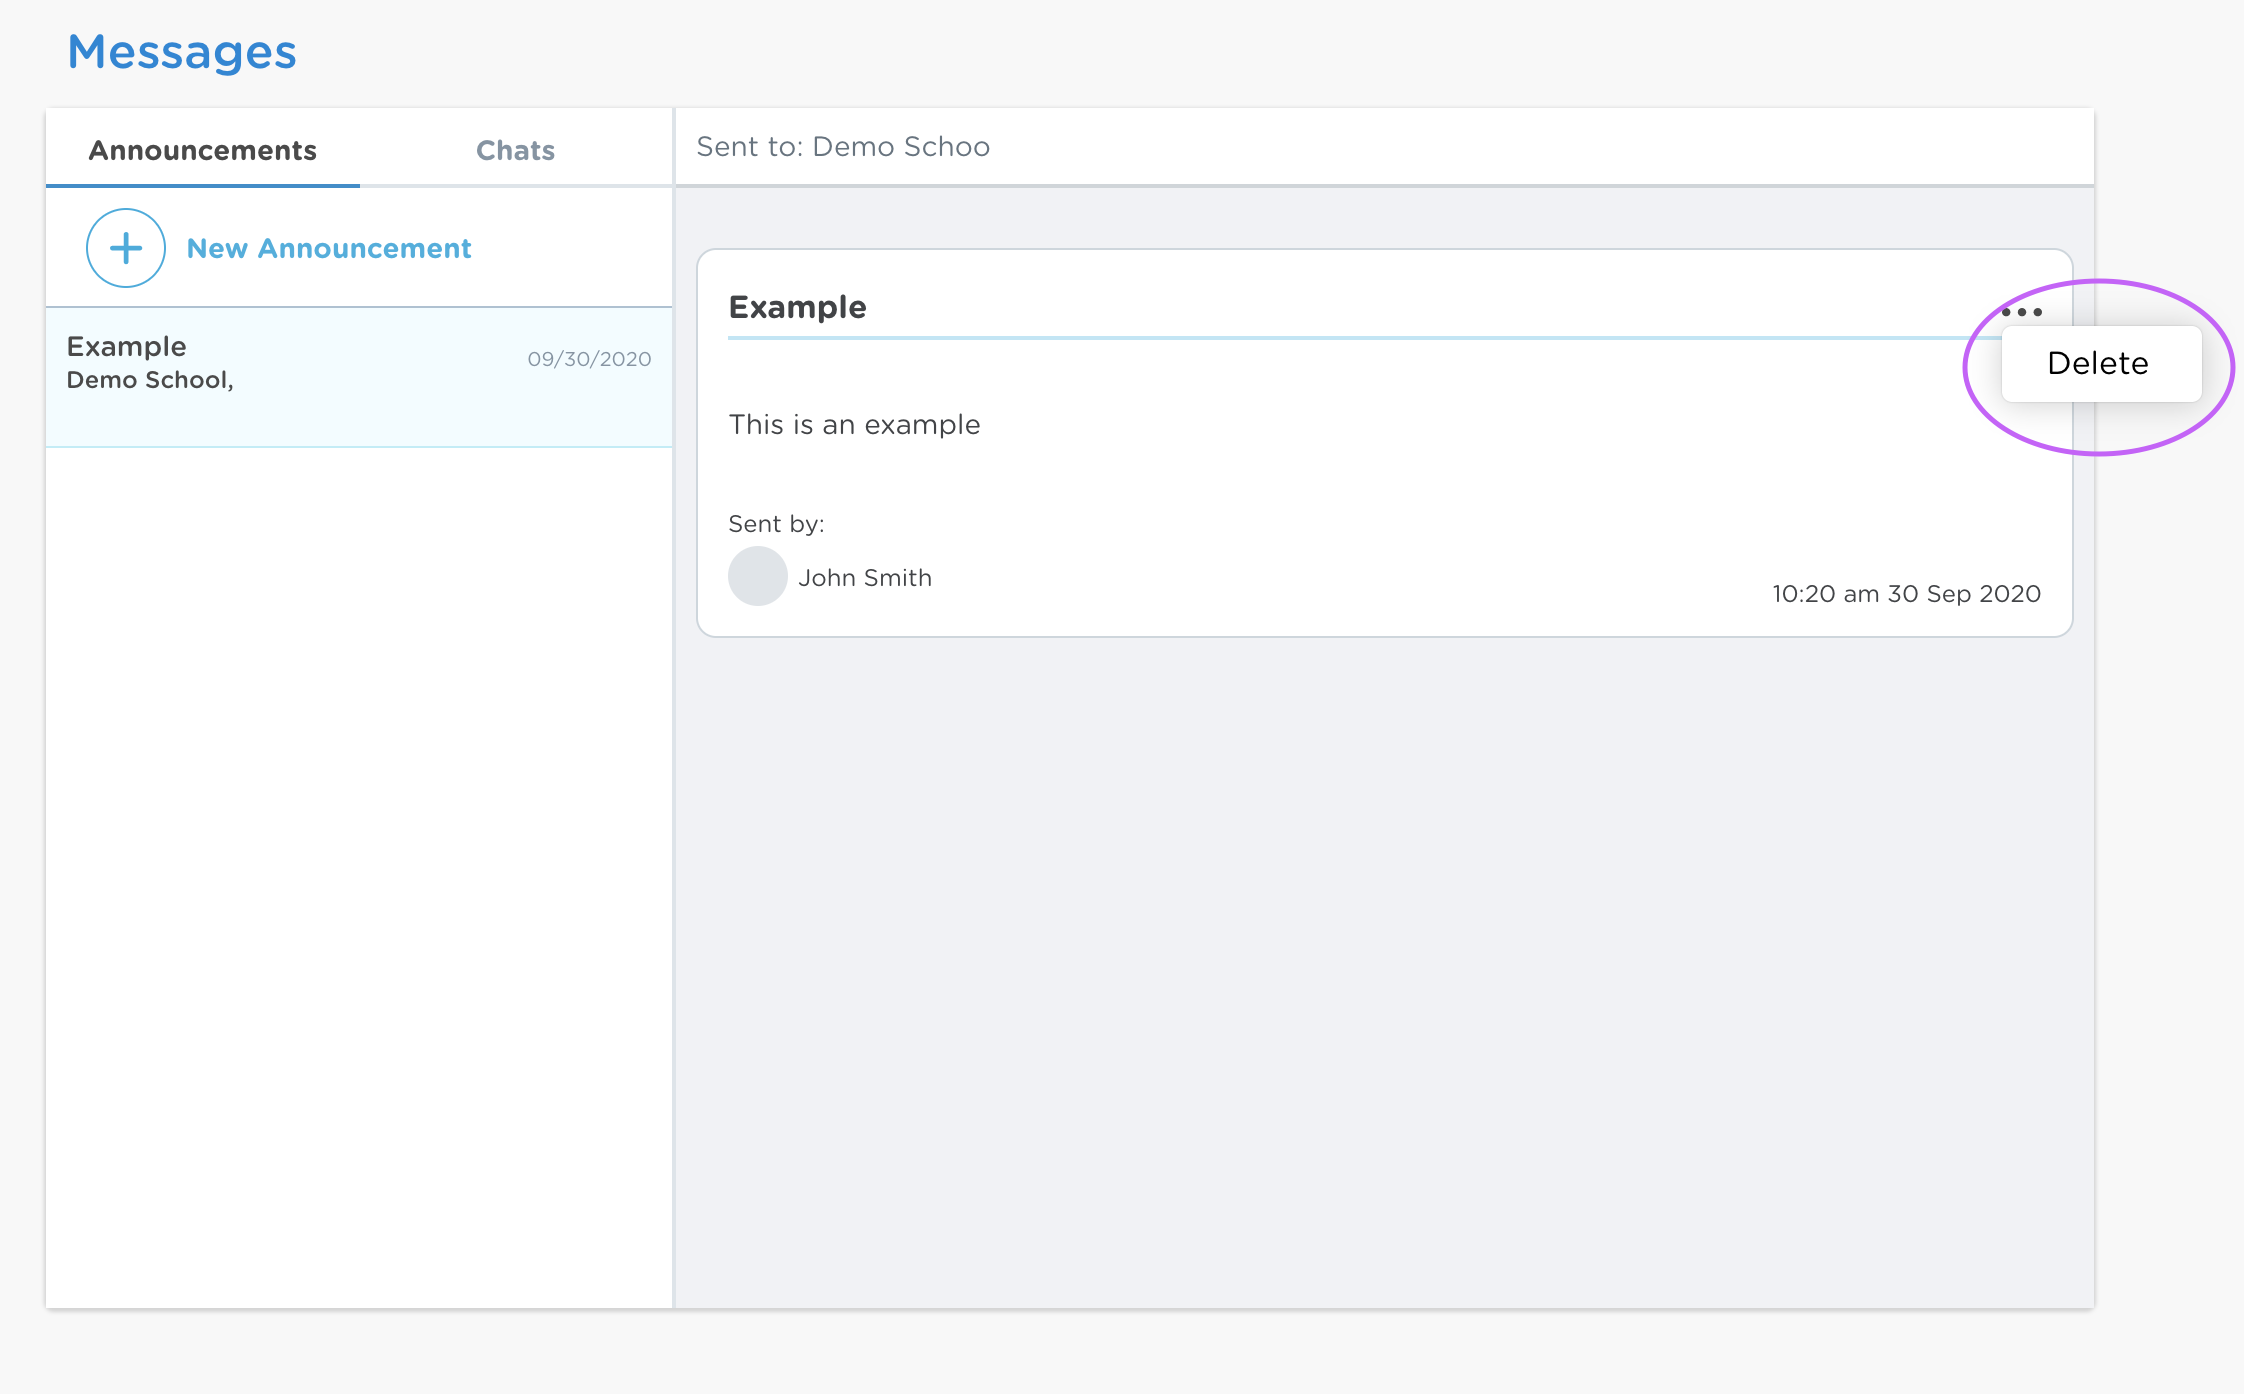
Administrators can delete notices and announcements that other collaborators have sent, but the other collaborators can only delete their own messages.
Private Messages (Chats)
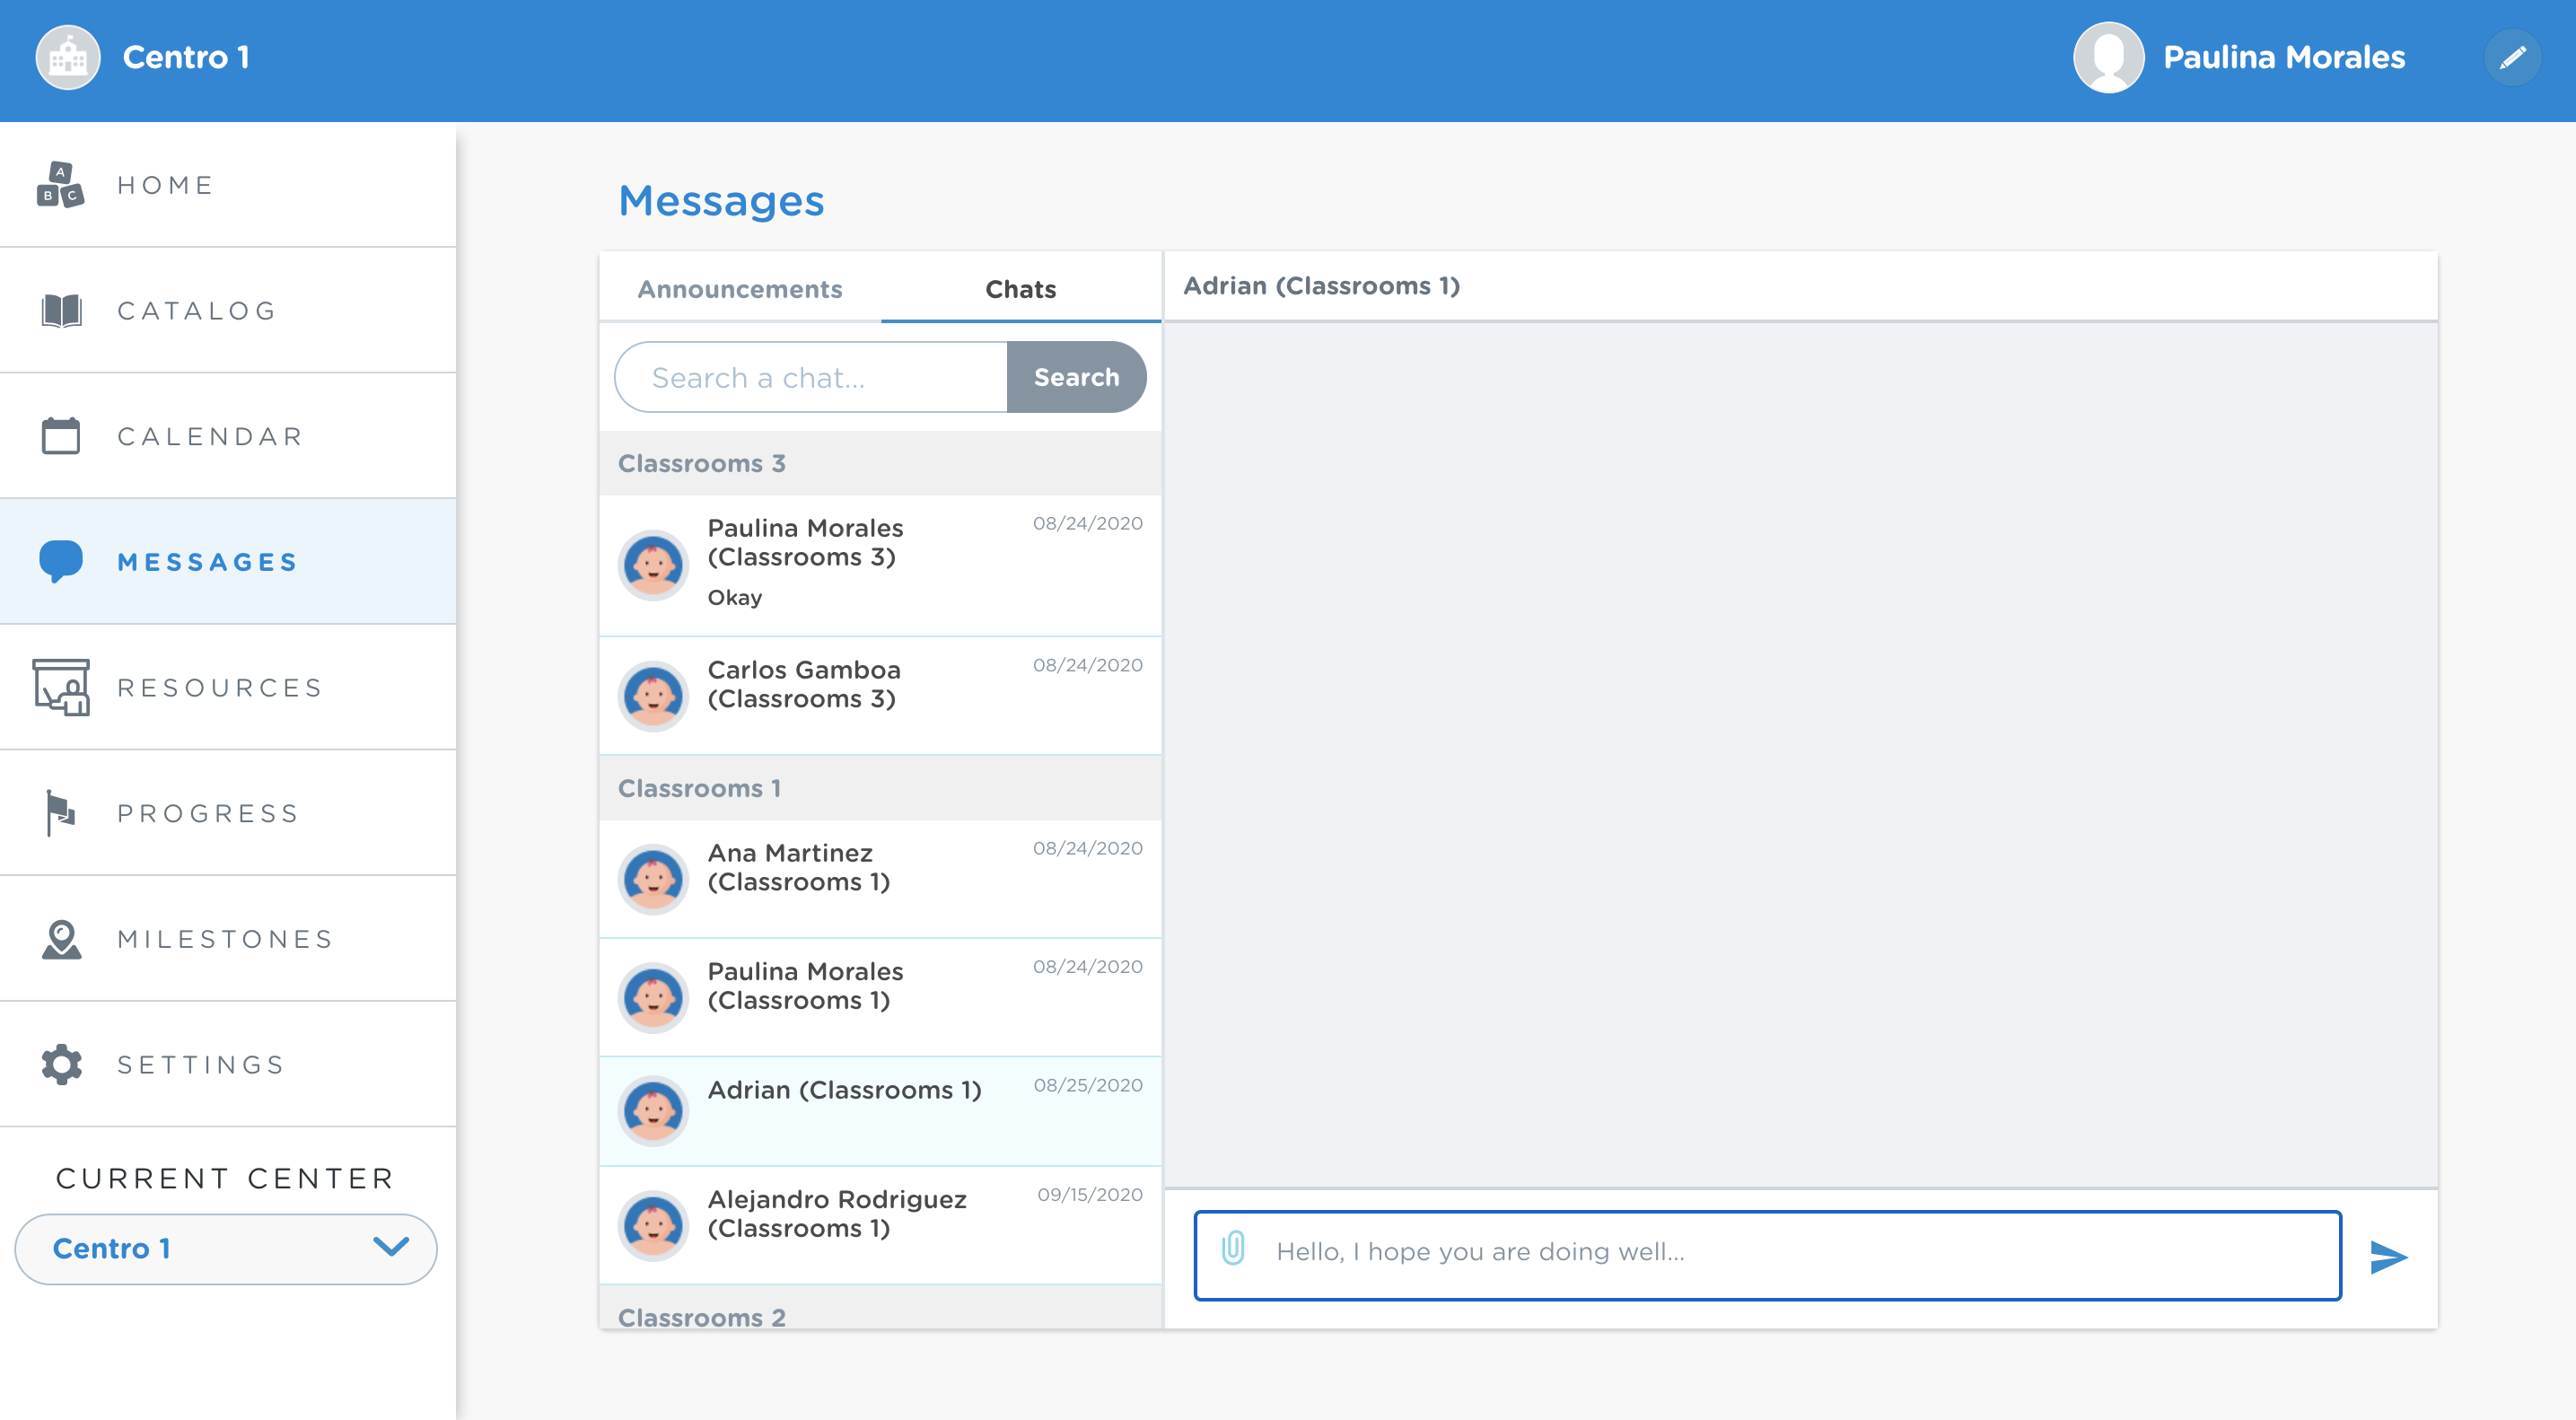
The chat option will allow you to have a more direct and personal conversation with parents. To send out a new message click on the “New chat” option at the top of the “Chat” page. Select the name of the student whose parents you want to contact, and write your message. You can also send links and documents of up to 10MB through the chat.
Anyone related to the student in question has access to the chat:
- Parents
- Teachers assigned to the student’s classroom
- Center administrators and directors
All these users can see and send messages on the chat.
Deleting a Private Message
Just like with the announcements, you can delete a chat message by clicking on the three dots on the upper right corner. When you delete a message, it will be replaced by a notice that says “This message has been deleted”.
Seeing the Messages History
The message history of every student will be saved on the student’s private chat page. There you’ll be able to consult all the sent and deleted messages and files.
It’s important to remember that anyone related to the student in question has access to the private chat history (parents, teachers, directors, and administrators).
Forums

On the “Chats” tab of the messages section, you will find a button called “Forums”, which will allow you to create forums with parents and collaborators from your institution. Parents will be able to join from the Kinedu app.
In this section you will find the forums to which you’ve been added, and the forums you’ve created.
Creating a new forum
- Click on the “+ Add forum” button.
- Enter the name and description of the forum, then click next.
- Select the audience that will be able to view and join the forum (this part is optional).
- Add the collaborators you want to include, and assign who will be the moderators (this step is optional as long as you don’t deselect yourself).
- Add the students that you want to include in the forum initially (all the family members related to the students will be added to the forum, this step is also optional).
- Done! You’ve created a new forum.
All the forums you create will include you automatically, but you can choose to get out and assign another moderator.
Editing a forum/Adding people
- Click on the (i) on the upper right corner of the forum.
- Consult the members of the forum.
- Click on “Edit forum”.
- You can edit the name and description of the forum.
- You can edit the forum audience, if necessary.
- You can edit, add and assign moderators (you can delete and add new ones).
- Pick the students you want to add to the forum (all the family members related to the students will be added to the forum and will have access to the chat).
- Done! You’ve edited the forum.
You can also add members using the “+ Add people” button.

Deleting a forum
Note: You can only delete a forum if you created it or if you’re a moderator.
- Click on the (i) on the upper right corner o the forum
- Click on the “Delete forum” option at the bottom of the list
- Confirm the action by clicking “Yes”

Activity Catalog

Search for activities
The activity catalog includes more than 1,400 activities for all ages, related to all kinds of themes and styles. To access the catalog just click on the “Catalog” button on the left of the screen.
There you’ll find activities divided into three subsections:
- Areas
Here you’ll find activities filtered by the four areas of development: physical, cognitive, linguistic, and social and emotional. Clicking on any of these categories will show you the available activities related to each area.
- Themes
Searching for activities by theme will show you all the activities related to a specific toic. The themes shown are predetermined.
- Your Center
The activities on the section that has your institution’s name are activities added by a member of your school or center.
Adaptations
Some activities can be adapted to fit the different levels of development of the students. These adaptations will make sure that an activity is challenging enough (or simple enough) so that the students can be evaluated accordingly.
Filtering activities

Another simple way of finding activities is using the search bar and filters within the catalog.
On the search bar you’ll be able to filter by:
- All activities and collections
- Kinedu activities and collections
- Personalized activities, collections and subcollections
- Age (0 -72 months)
Within the filter you’ll be able to choose:
- Tags
- Multiple areas
- Skills (directly related to the areas)
- Multiple themes
The benefit of using the filters is that you’ll be able to choose any combination of features to tailor search results to your specific needs.
Creating collections
Now you’ll be able to create collections from your center’s tab in a quicker way.
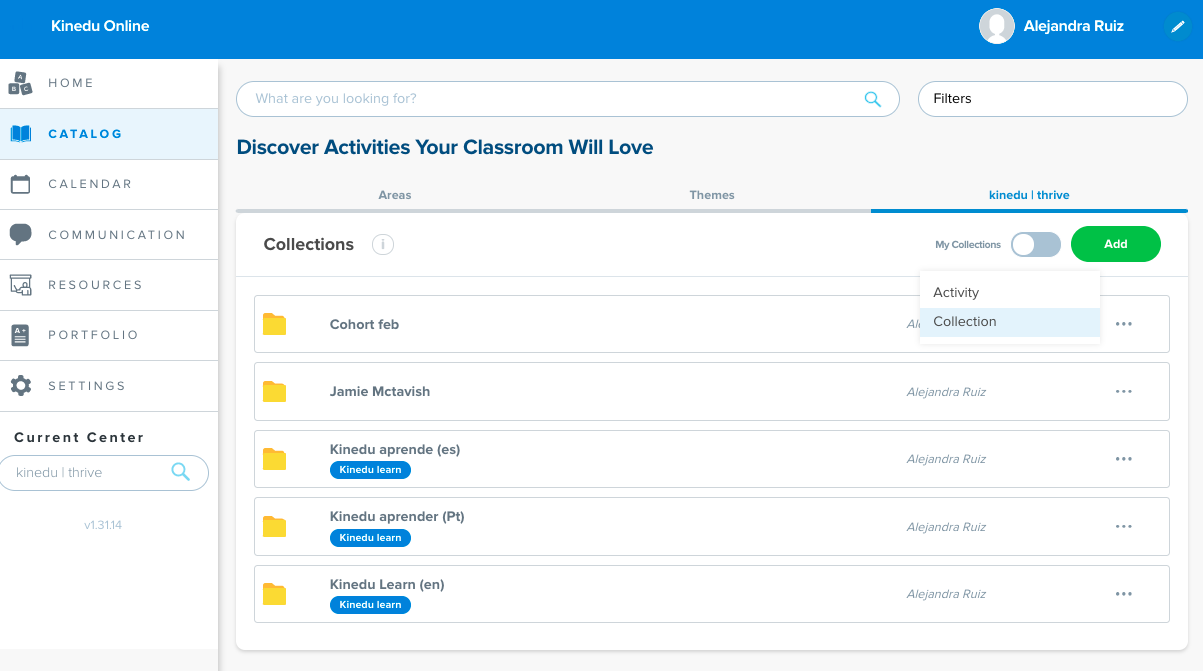
- Enter your center’s tab.
- Select the “Add” button.
- Select the “Collection” option.
- Enter the name of the collection.
- Choose who you want to share it with.
- Choose or assign up to three tags.
- You can use tags created by someone else.
- You can create and edit your own tags (color and name).
- You can delete tags.
- Click on “Create”.
- Done! Your collection has been created.
Uploading your own activities
You can take advantage of this feature if your school or center has its own activities that you want to upload and add to the weekly plans.

Follow these steps to upload an activity:
- Select your center’s name in the catalog section.
- Click on the “Add” button.
- Select the “Activity” option.
- Select the collection and subcollection that you want to add this activity to, or if it’s necessary, create a new collection and subcollection.
- Fill out all the information, like title, description and images to illustrate what the activity is about.
- Fill out the pedagogical information (this only applies for Developmental Activities).
- Establish the access permits for the activity.
- Done! You’ve added a new personalized activity to the catalog.
Subcollection
On the Catalog section, you’ll be able to add subcollections inside of your collections, so you can organize activities better.
Creating a subcollection
- Enter a Collection
- Click on the “Add subcollection” button
- Write the name of the new subcollection
- Choose or assign up to three tags, then click Next
- Enable or disable the “Share subcollection with parents” option
- In case of enabling the option:
- Personalize the card that parents will see on the App by choosing a color and an image
- Choose the centers that you want to share the subcollection with
- Select the classrooms that you want to share the subcollection with
- Click on the “Create” button, and you’ll be done!
7. If you don’t enable the option, just click “Create” to finish.

Edit a subcollection
- Enter the subcollection.
- Click on the three dots (…) on the right and choose “edit”.
- Modify the information you wish to edit.
- Click “Save”.
Upload activities to your subcollections
- Click on the “Upload activity” button.
- Fill out the corresponding information:
- Collections and subcollections
- General information
- Indicators
- Community
- Click on the upload button, and you’re done!
Deleting a subcollection
- Enter the subcollection.
- Click on the three dots (…) on the right and choose “delete”.
- Confirm that you want to delete.
Privacy
The activities you upload can have different visibility settings for the Organization, Center, and Classrooms. This means that depending on the level of privacy you choose, only certain collaborators will be able to see them. You can also manage the visibility settings of a specific collection, defining which collections are accessible for certain members of the organization.
Adding an activity from the catalog to your plan
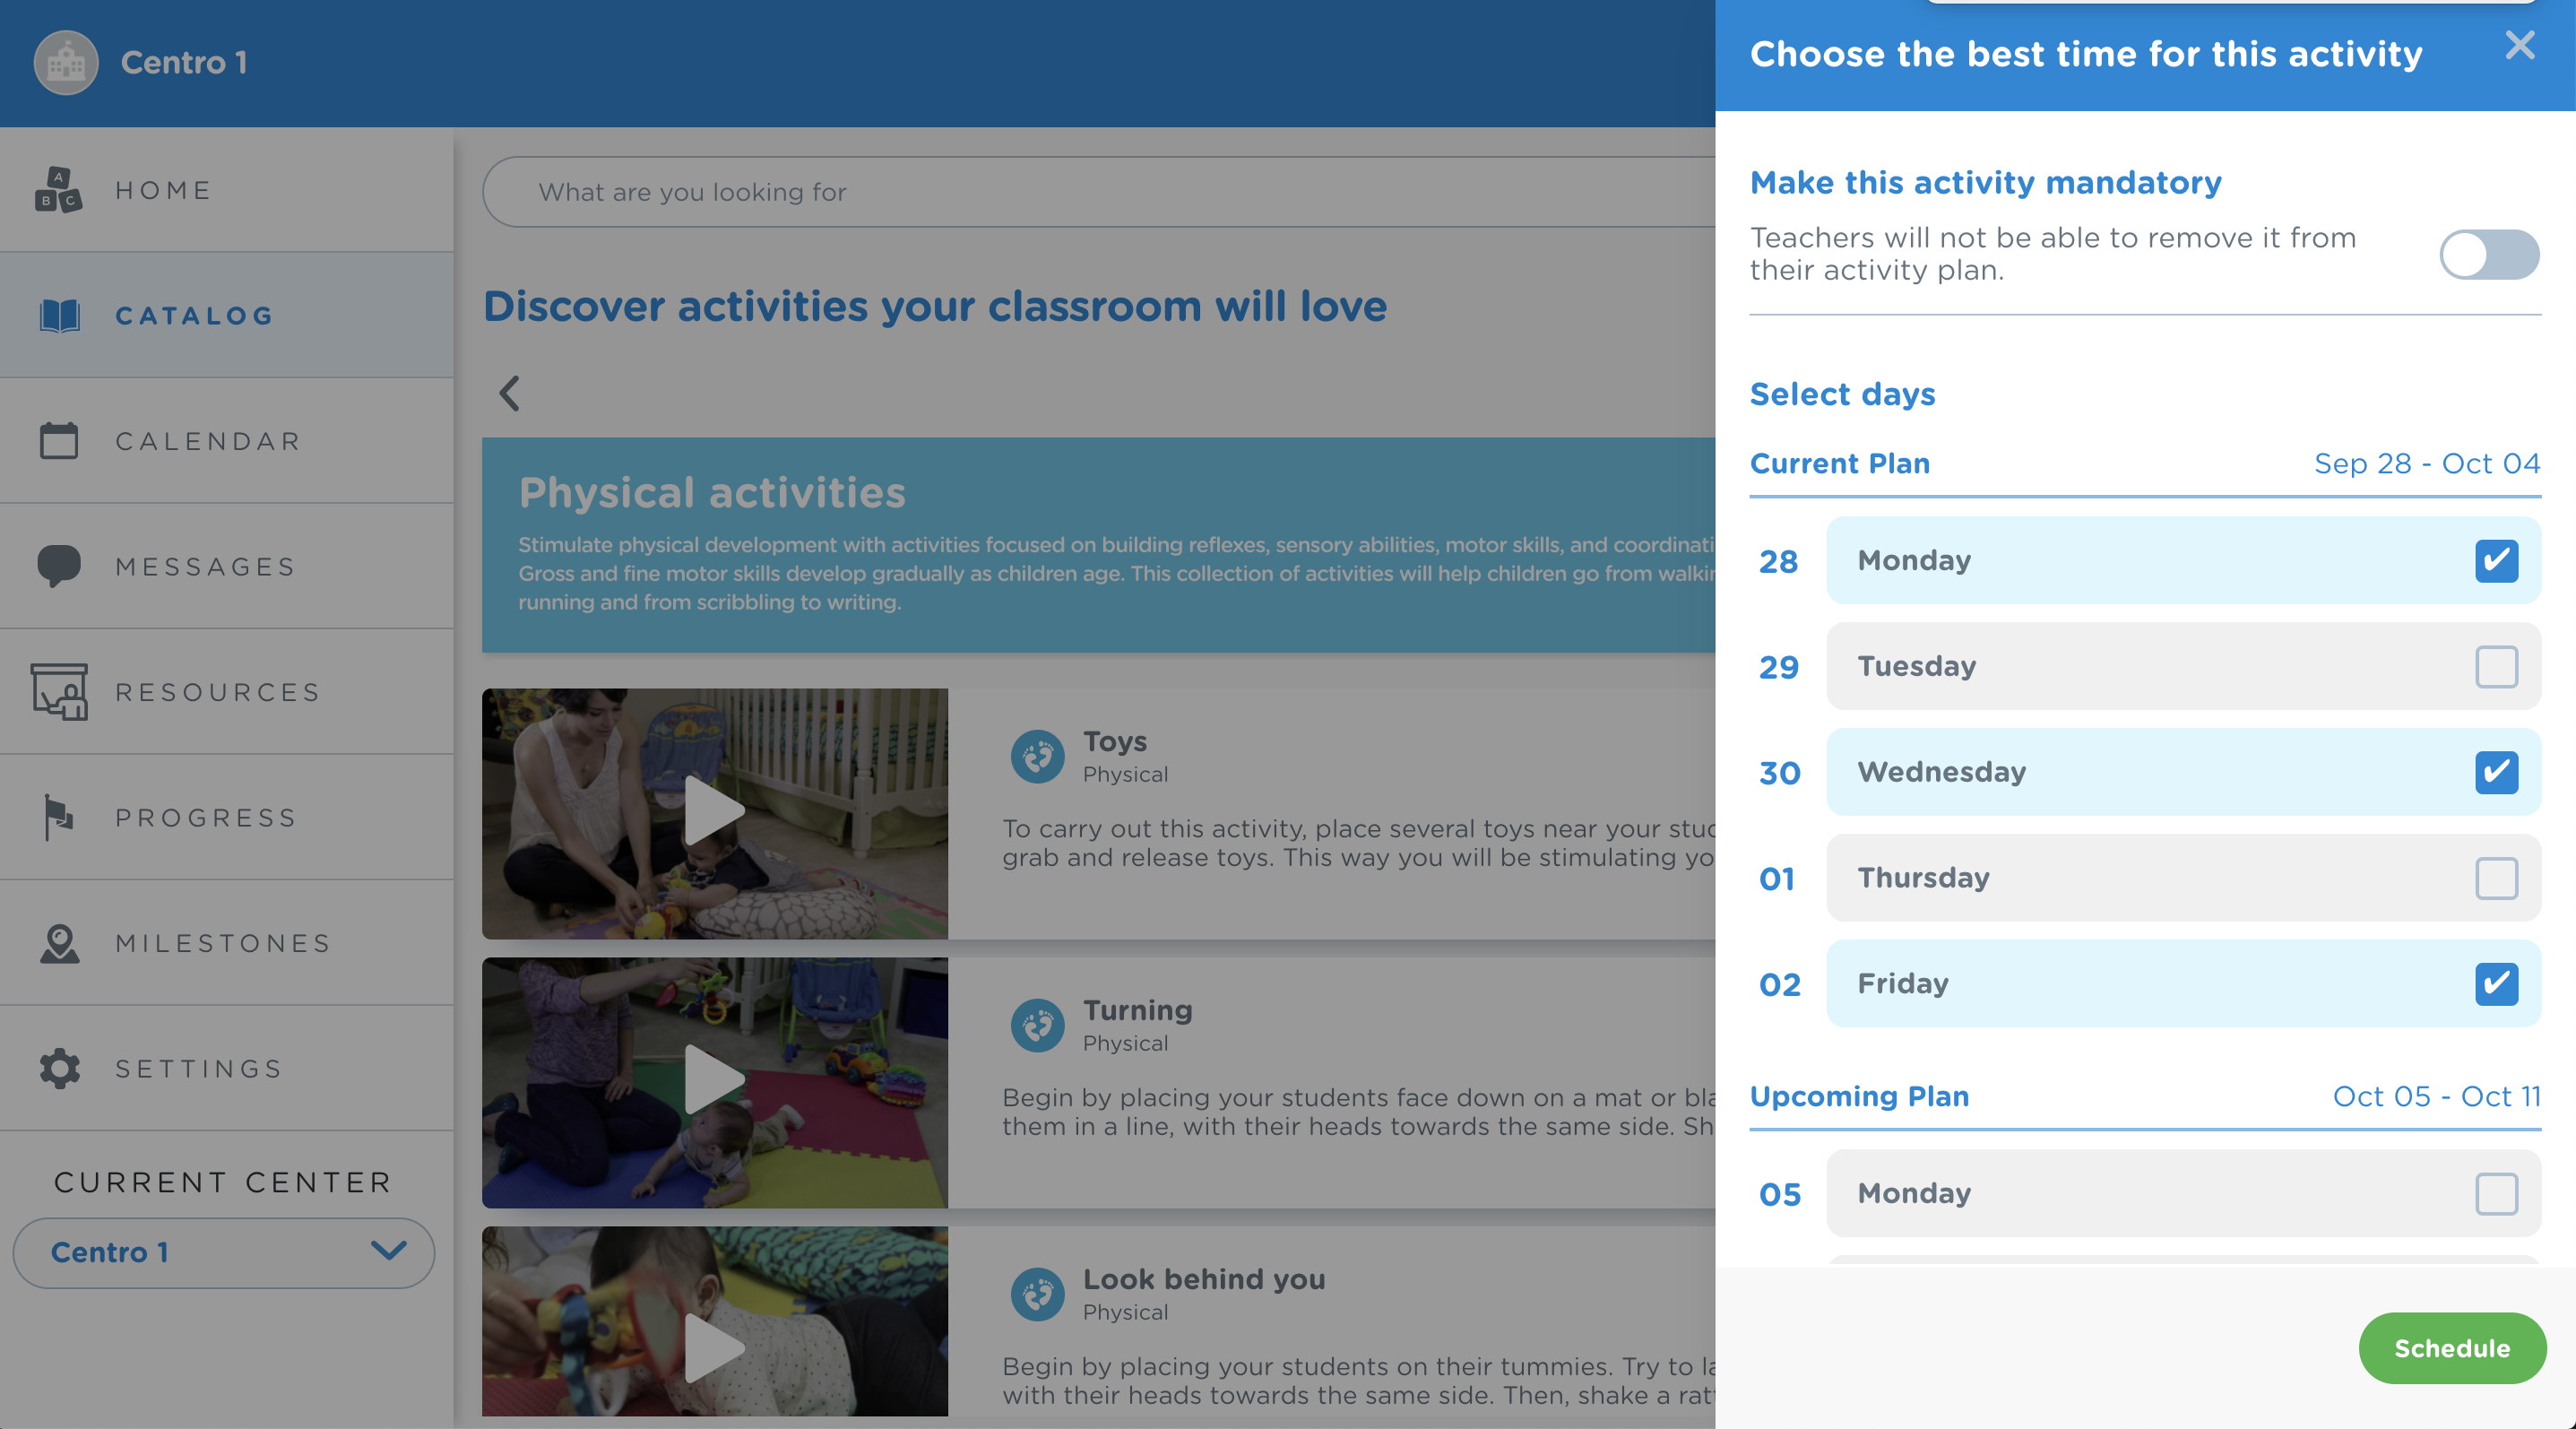
You can add activities from the catalog to an already existing weekly plan through the following steps:
- Go to “Catalog”.
- Choose the activity you want to add and click “Schedule”.
- A window will pop up for you to fill out the information about the classrooms and days that you’d like to add the activity to. As an administrator, you can decide if you want to make the activity mandatory in the weekly plan.
Calendar
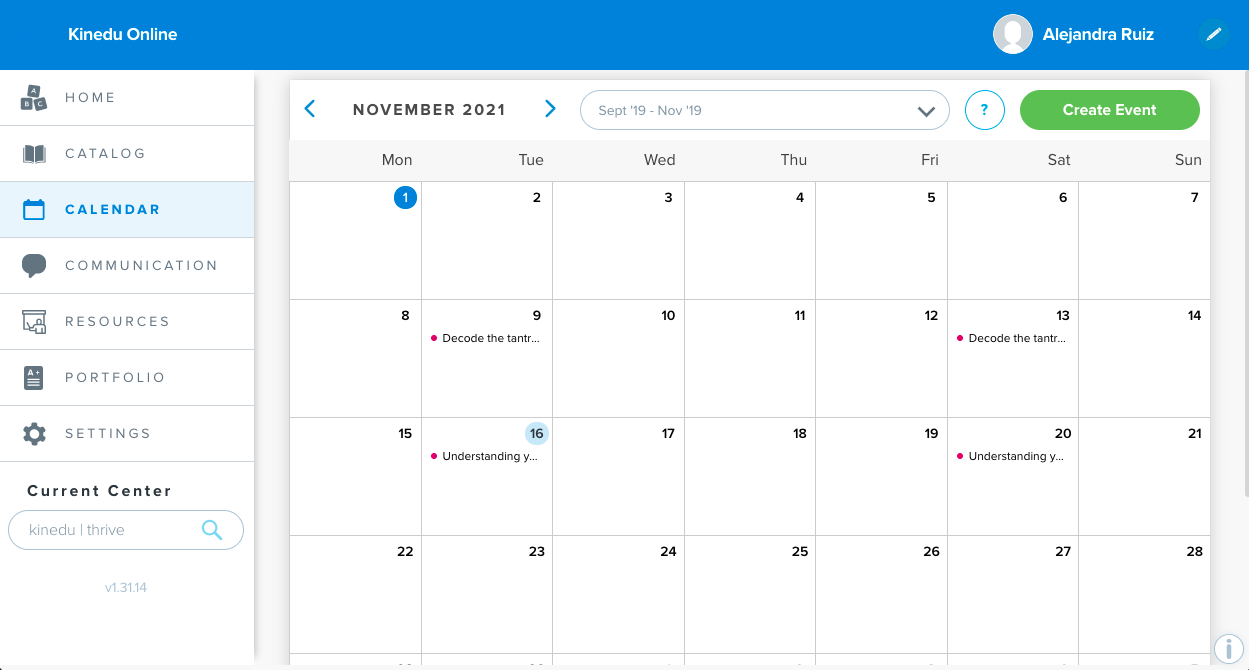
The calendar will allow you to schedule center or school activities. Here you’ll be able to schedule everything from virtual meetings to school events.
Creating a new event
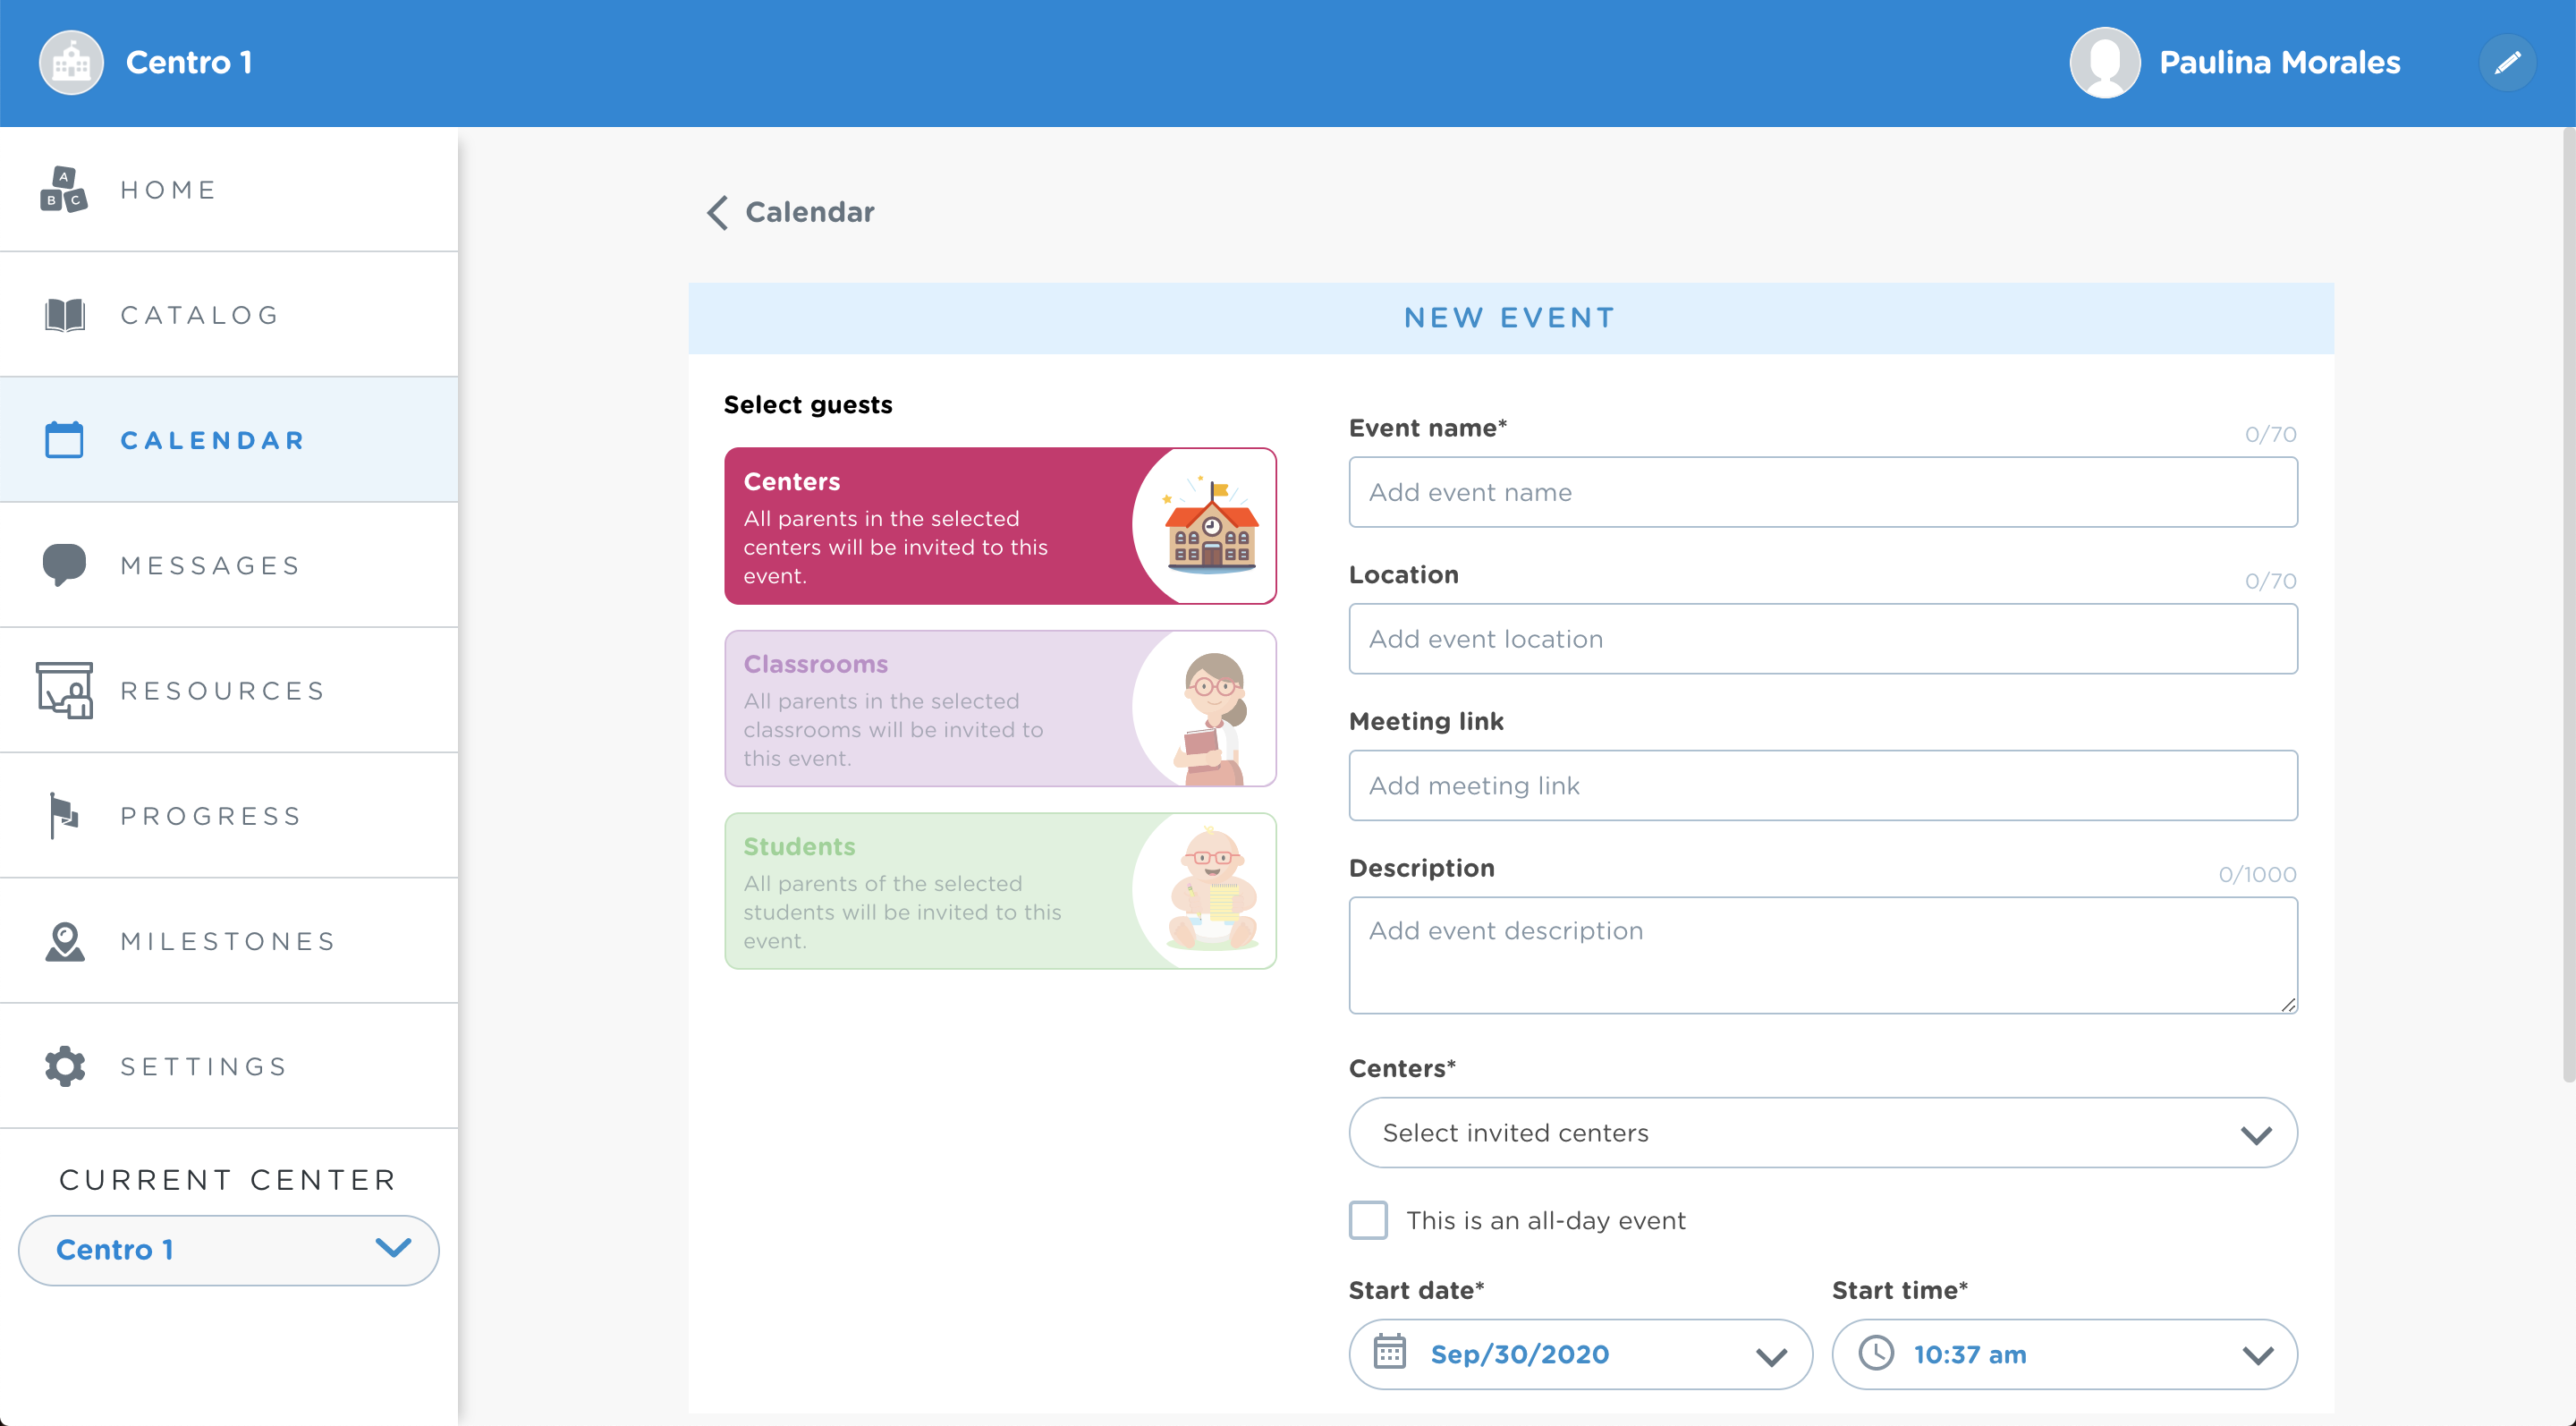
To create a new event click on the “Create event” option. Select who the event will be addressed to and fill out the information. The event will be sent automatically to parents and teachers, and they’ll be able to see all the relevant information about it.
Creating a recurring event
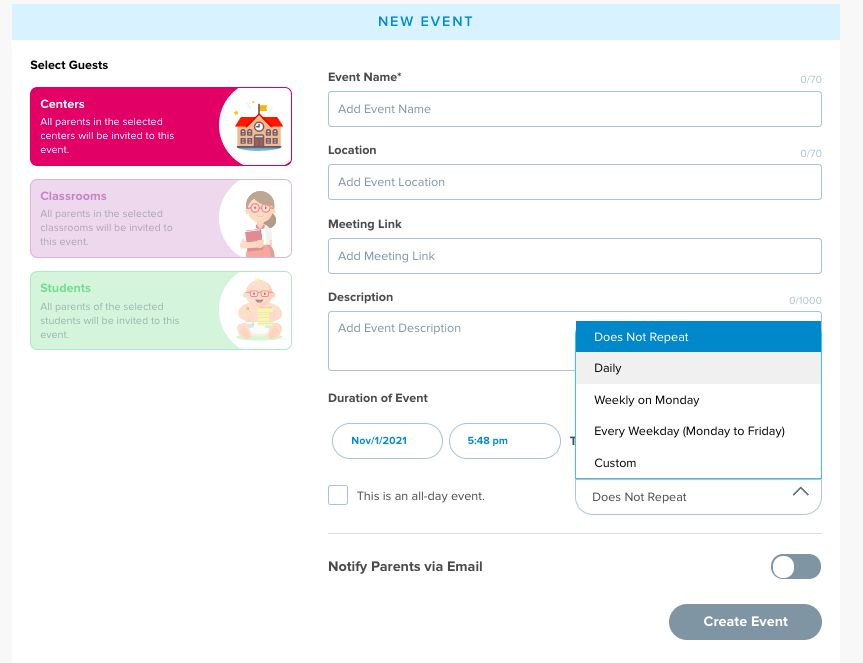
When you create an event, you’ll have the option of making it a recurrent event. You will have three predetermined options (daily, weekly, and Monday to Friday), and you will also have the option of creating a personalized recurrence.
Editing or deleting an event
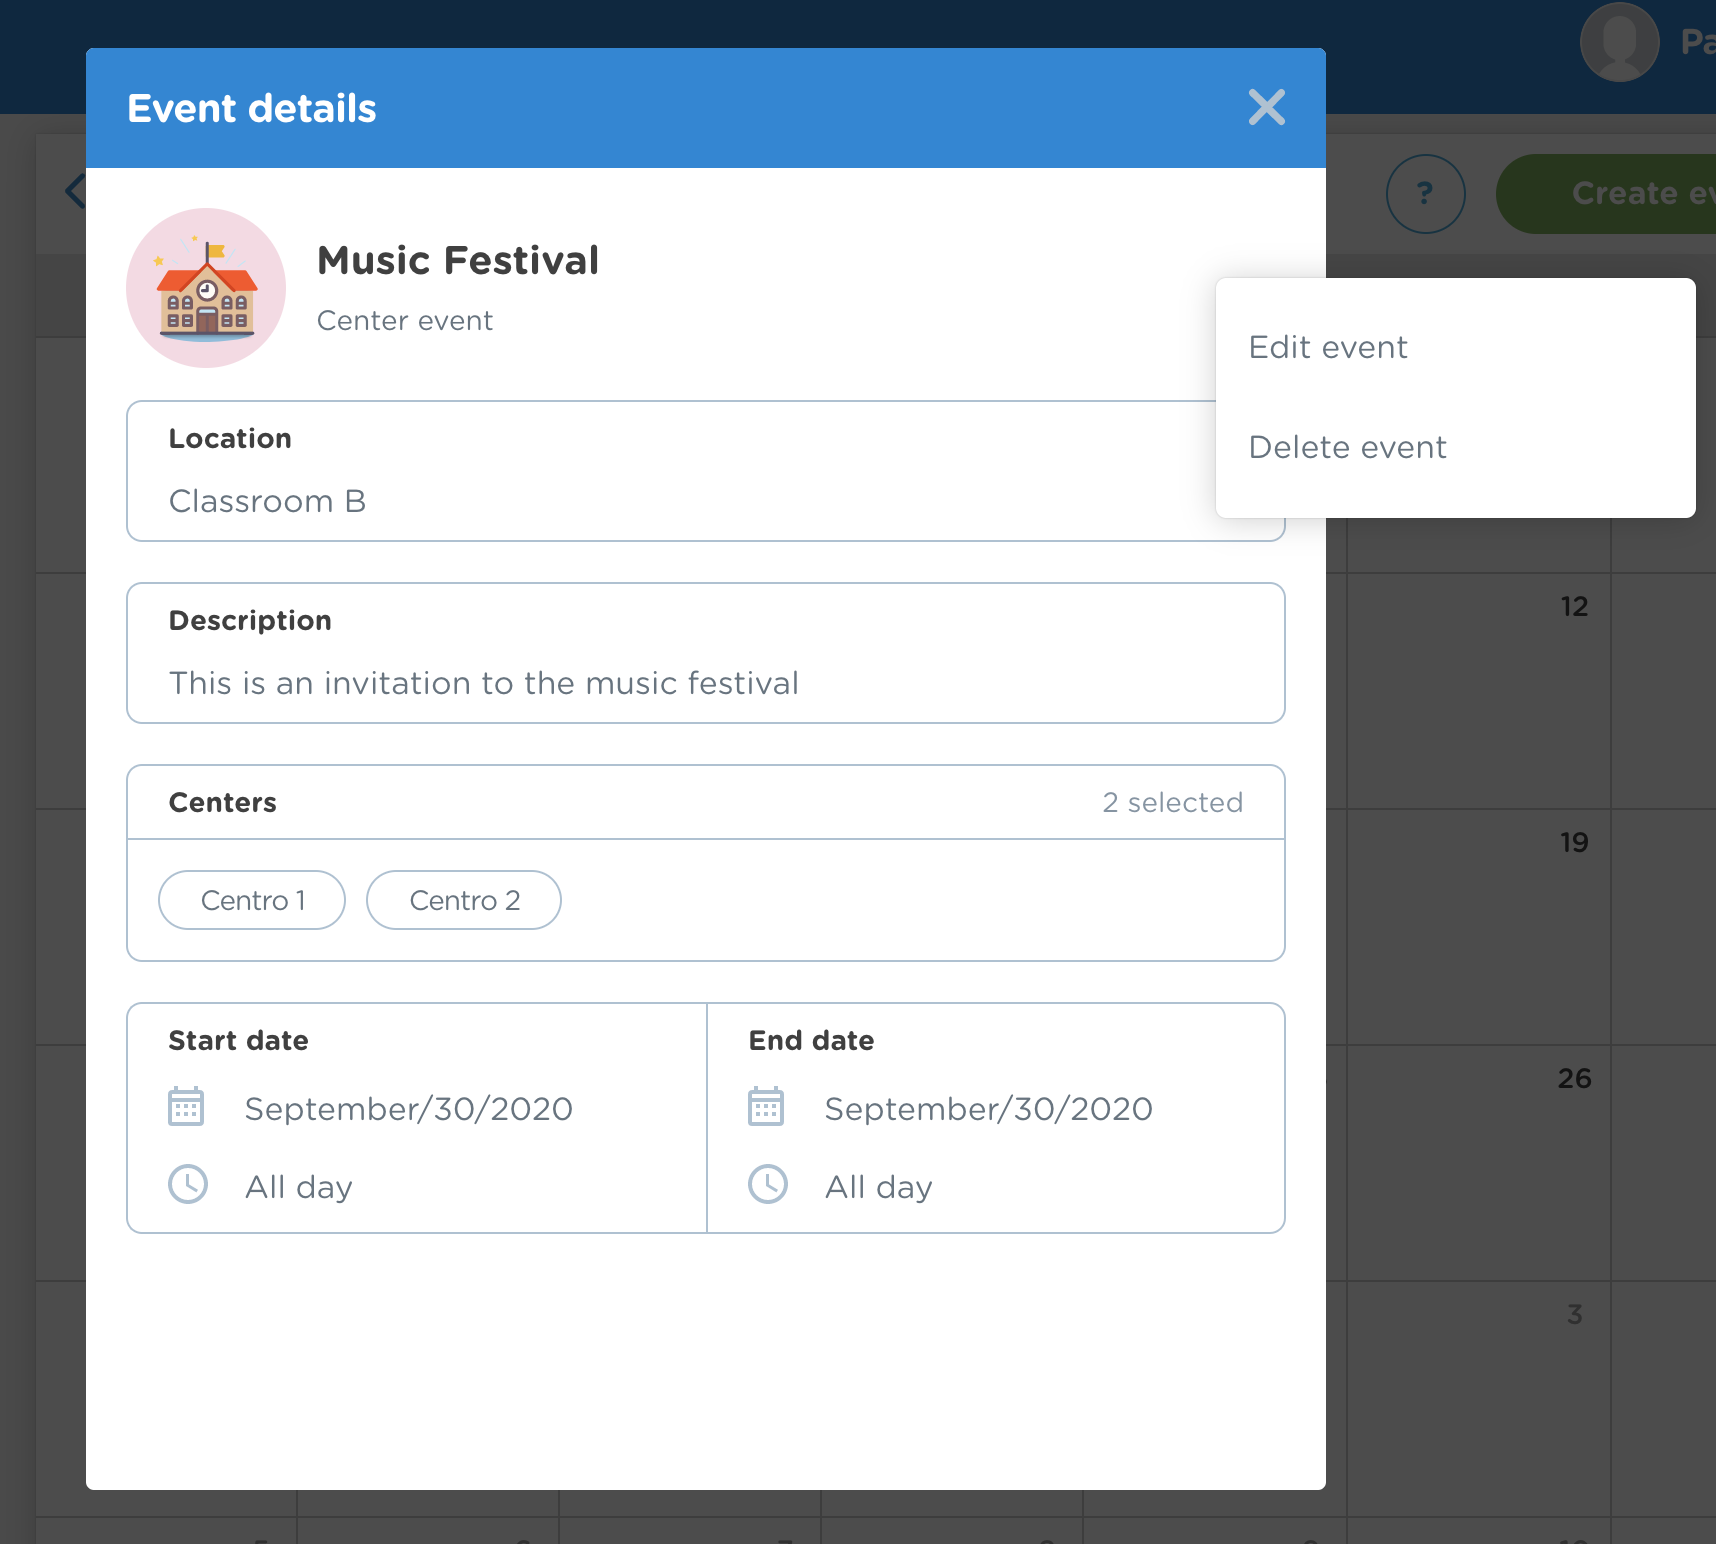
If you wish to edit or delete an event, select the desired event on your calendar. A window describing the event will pop up, and you’ll be able to see three dots on the top right corner. Click on the dots and select if you want to edit or delete the event. If you delete an event, it will also be deleted on the parents’ and teachers’ calendars.
Portfolio
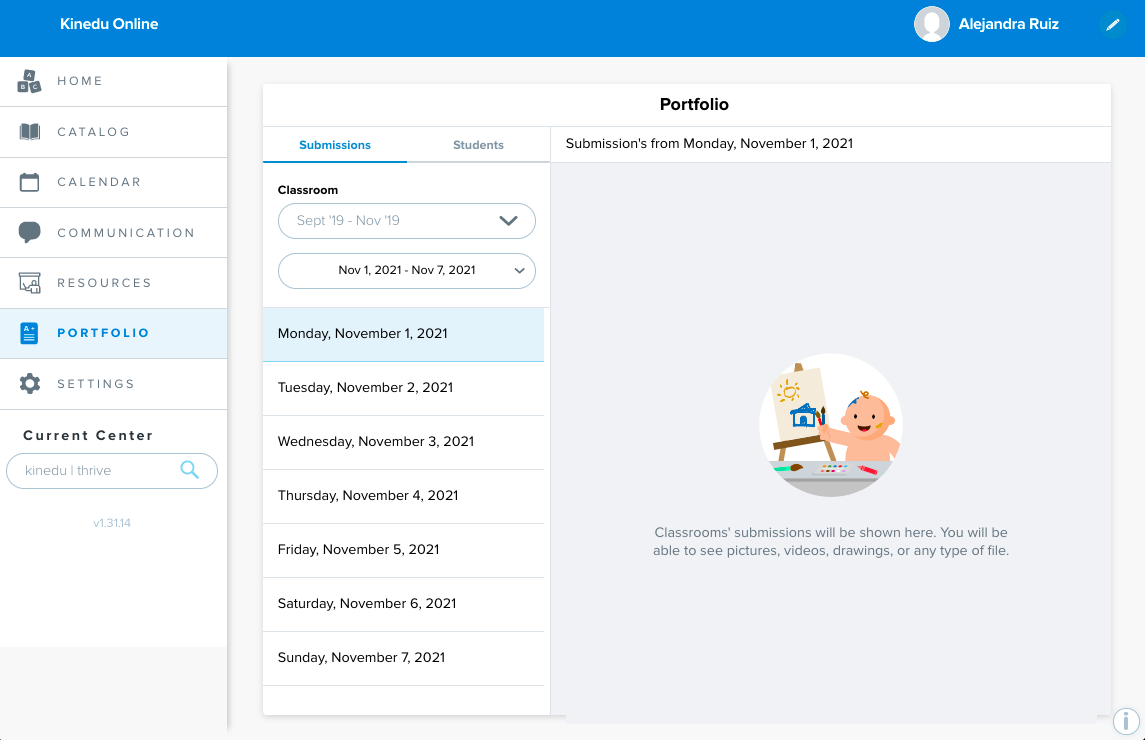
This new section contains the evidence handed in by parents, so the teacher can see it easily and quickly. Information will be divided into two tabs:
Submissions
There are 2 drop down menus on this section that will work as filters to view the evidence:
- Choose the classroom you want to visualize.
- Select the week and month you want to view.
- Select the day of the week from the list under the drop down menus.
The activities will be organized chronologically, with the oldest ones on top.
Students
When you select the students tab you’ll see a drop down menu with all the classrooms. To access the content:
- Choose a classroom from the menu.
- Select a student.
- On the right side you’ll be able to see all the activities divided according to the date they were handed in through the app.
Educational resources
The educational resources are files that you can save on Kinedu Educators to make the educational process easier. You can add them to your activity plans and send them to parents. These files can be images, PDFs, or links.
Browsing resources
Types of resources
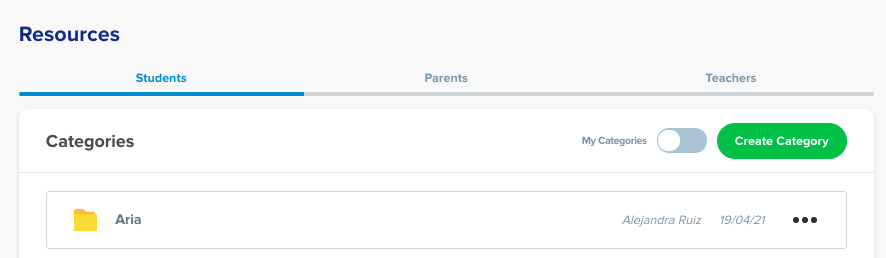
Our platform allows you to access pre-recorded resources selected by Kinedu’s expert learning team, as well as uploading your own resources. To differentiate between your resources and those provided by Kinedu, you only need to identify the folder they’re saved in:
Blue folders: Resource provided by Kinedu Educators
Yellow folders: Your own uploaded resources
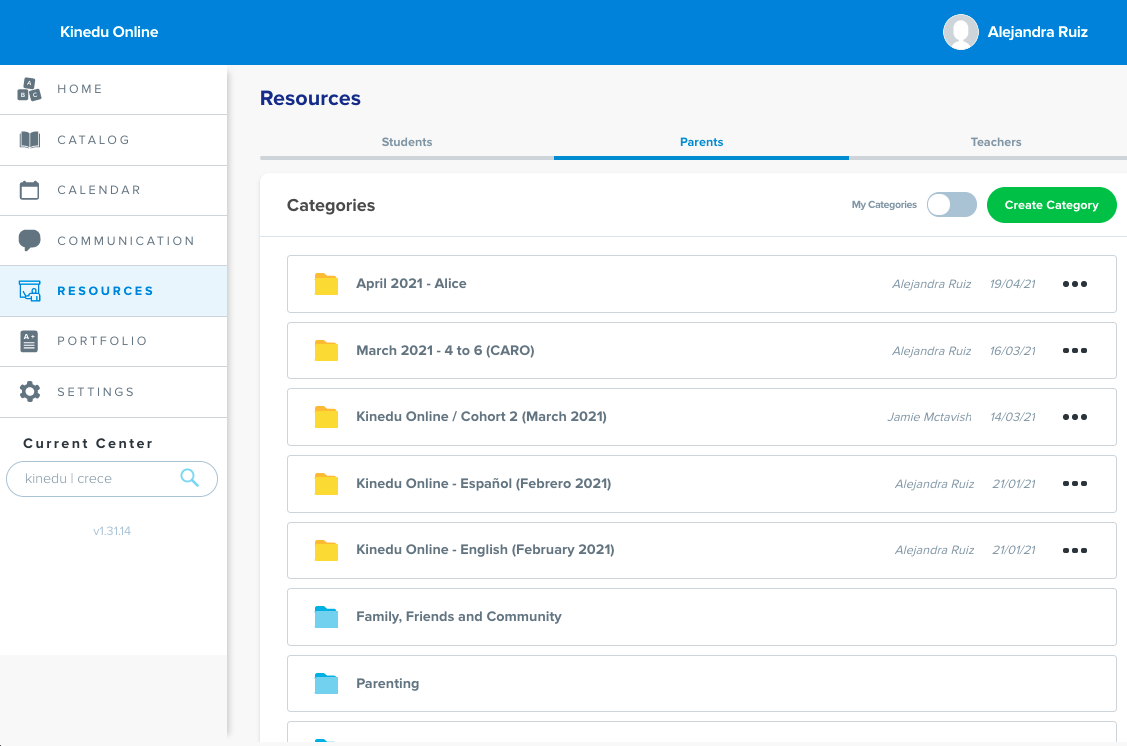
Resources Organization
Resources are saved in three different sections: resources for educators, resources for parents, and resources for students. These categories allow you to organize the resources in a way that is easier to access.
Categories and Subcategories
Each section is divided into categories; there are some pre-established ones and you can also add your own. These categories are the generalized way of viewing your resources.
Inside each category, there are folders that represent subcategories, where files are sorted out into more specific groups. You’ll be able to see all the files and resources by clicking on the subcategory folders.
When linking resources to activities, you will be able to search activities by collection and by activity name.
Adding your own resources
To add resources, first, you need to create a category and subcategory.
- Create a new category or make sure there’s already a category folder created by the school (a yellow folder).
- Create a new subcategory or make sure there’s already a subcategory created by the school (a yellow folder).
- Click on the “Upload resource” button.
- Fill out the resource information, so that whoever has access to it knows what the resource is.
Sharing resources with parents
Sharing resources with parents is very easy. Once you’re in the subcategory folder, you’ll be able to see the information of every available resource. Click on the three dots on the right-hand corner of the resource, and then select “Share with parents”. Then, just follow the instructions to select the recipient.
Kinedu for parents
Click here to see the Parents’ Guide